Today is your day! You’ve already jumped on the smartypants bandwagon by signing up for RW Elephant’s integrated credit processing. Congratulations you!
This next step will give you the right to put your hands behind your head and look smugly at the world with deep satisfaction in your cleverness.
It’s time for Online Payment Pages!
We’ve already introduced you to Email Templates and the One-Click Email Generator that happily lives on every Order’s Payment tab, so you know that you can zippily send Payment Links to your customers.
Now let’s take a look at where those Payment Links take them.
Voila! The Online Payment Page.
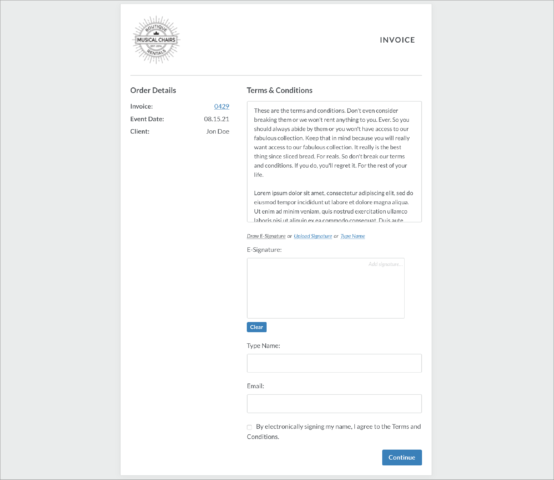
Check out your company logo at the top and view your Order Details on the left.
Your customers can read through Terms & Conditions in Step 1 before signing. Be sure to enable E-Signatures for a more streamlined process!
Once they’ve signed, they’ll be led to Step 2: Pay.
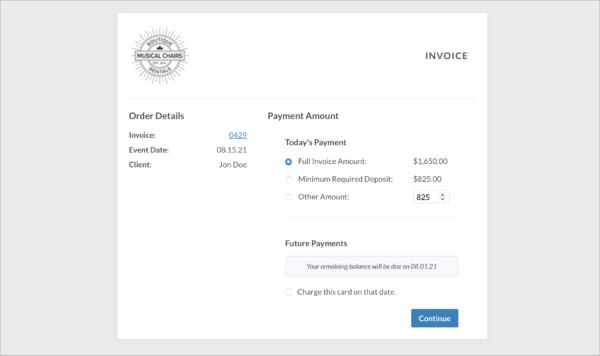
They can choose to either pay the Full Invoice Amount, their Minimum Required Deposit, or they can enter a specific amount in the “Other Amount” field (note: Other Amount must be greater than the Minimum Required Deposit).
Under Future Payments, a simple tick of the box will automatically charge the customer’s card on file for the reamining balance on the Final Balance Due Date.
Lastly, they will enter their credit card details to complete the transaction.

Customers will love how easy it is to pay you and cross that task off their to-do list.
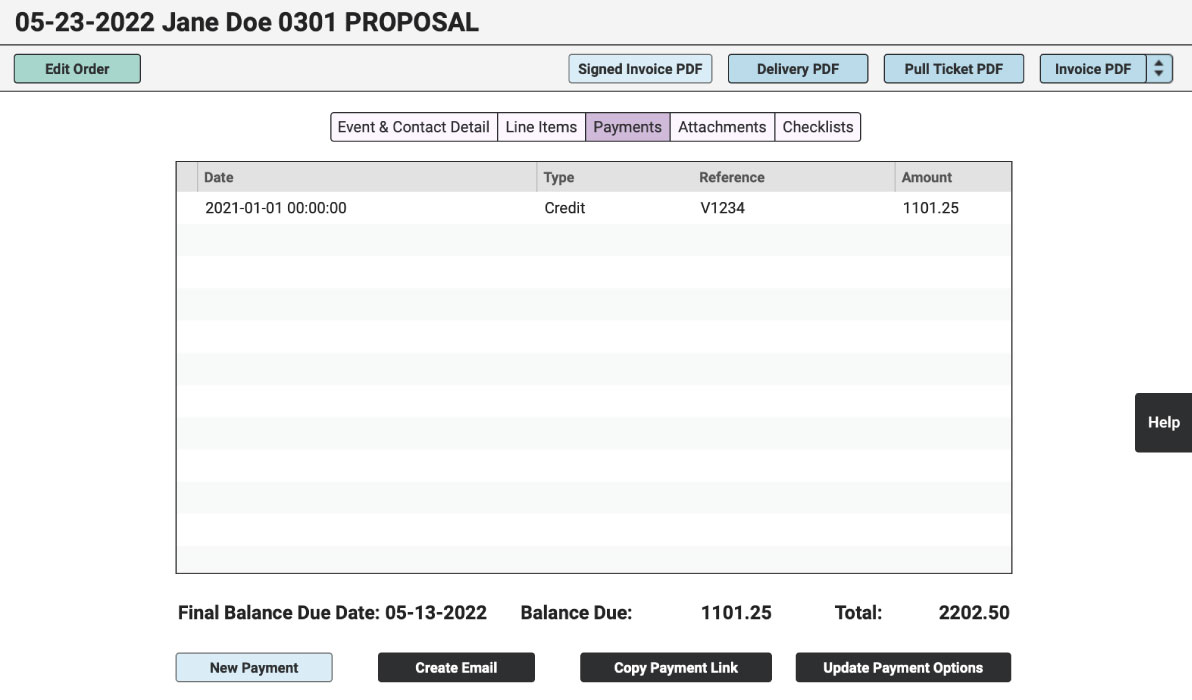
If you ever need to get to this payment link in a hurry, simply click the “Copy Payment Link” button.
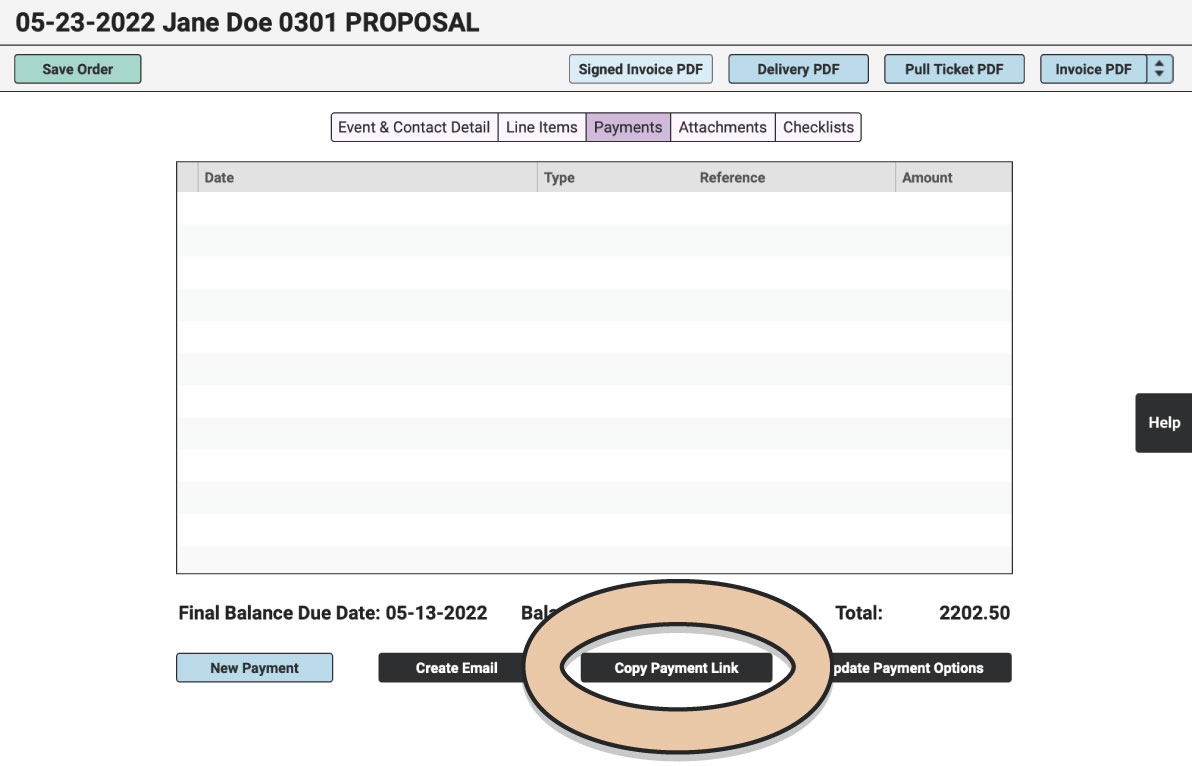
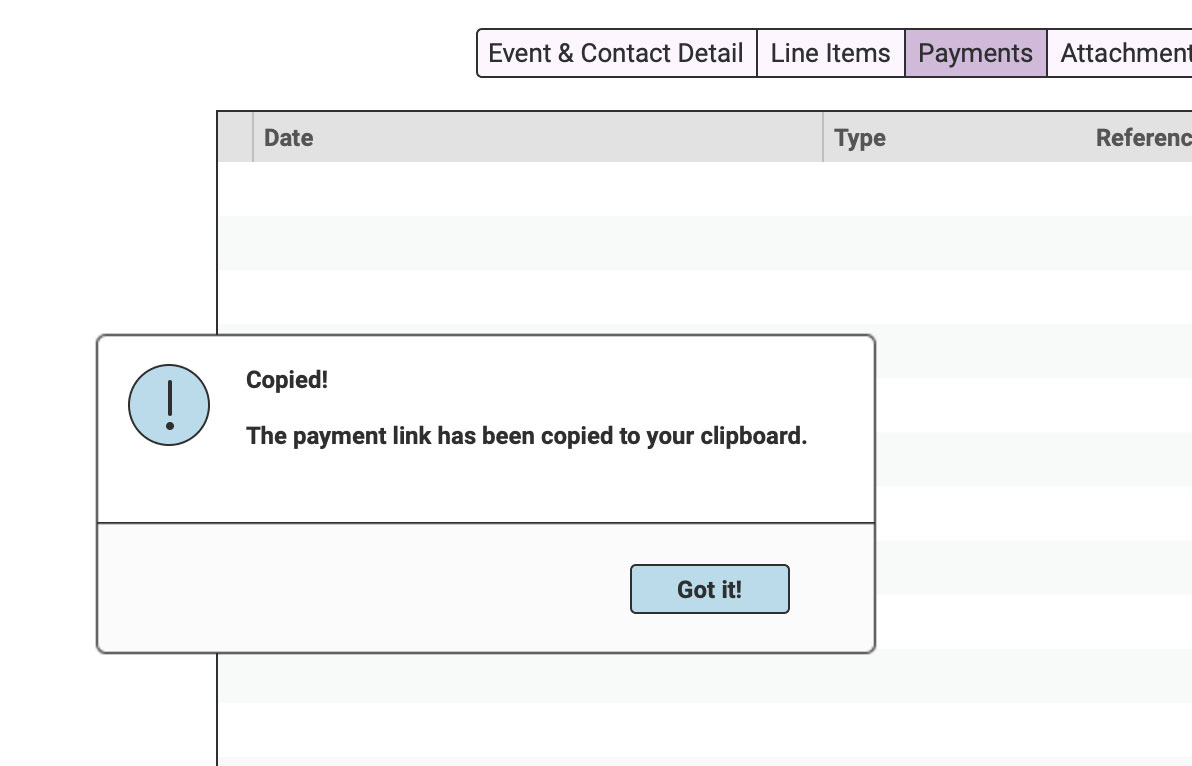
The link will be copied to your clipboard.
Paste it wherever you’d like. Your customer can even post it on GoFundMe to get crowdfunding for their rentals. 🙂
Once they have completed the Payment, it will appear within the “Payments” tab on the Order. Since they agreed to your Terms & Conditions at the time of the Payment, the Order will also automatically become Confirmed.
Any Online Payments you receive will be listed in the Daily Payment Summary Email that is sent to you from RW Elephant.
Additionally, when your customer submits an Online Payment, they will receive a Payment Confirmation Email.
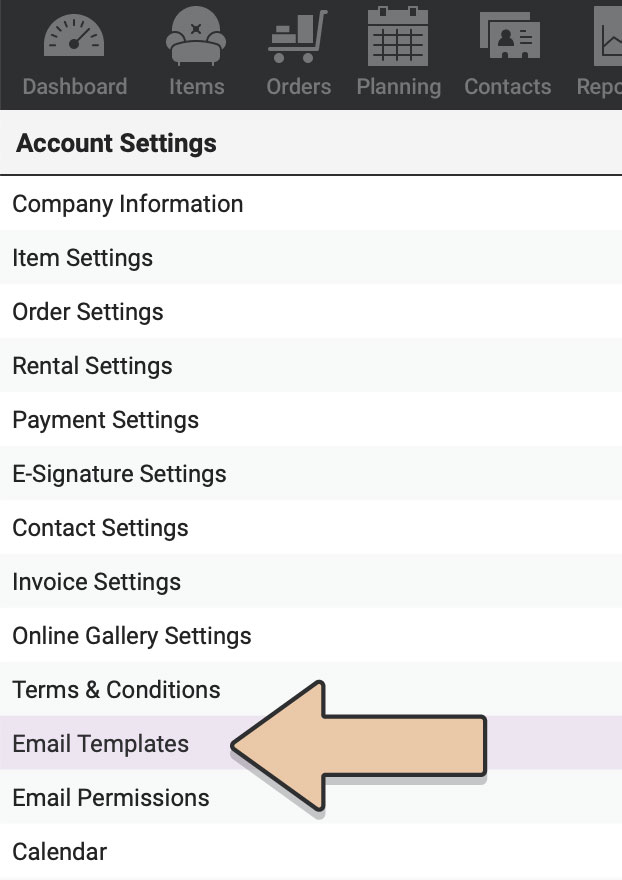
To format your Payment Confirmation Email, navigate to the “Account” icon in the upper right corner of your browser window.
In the left column, select “Email Templates.”
Click on “Payment Confirmation” in the list of Email Templates.
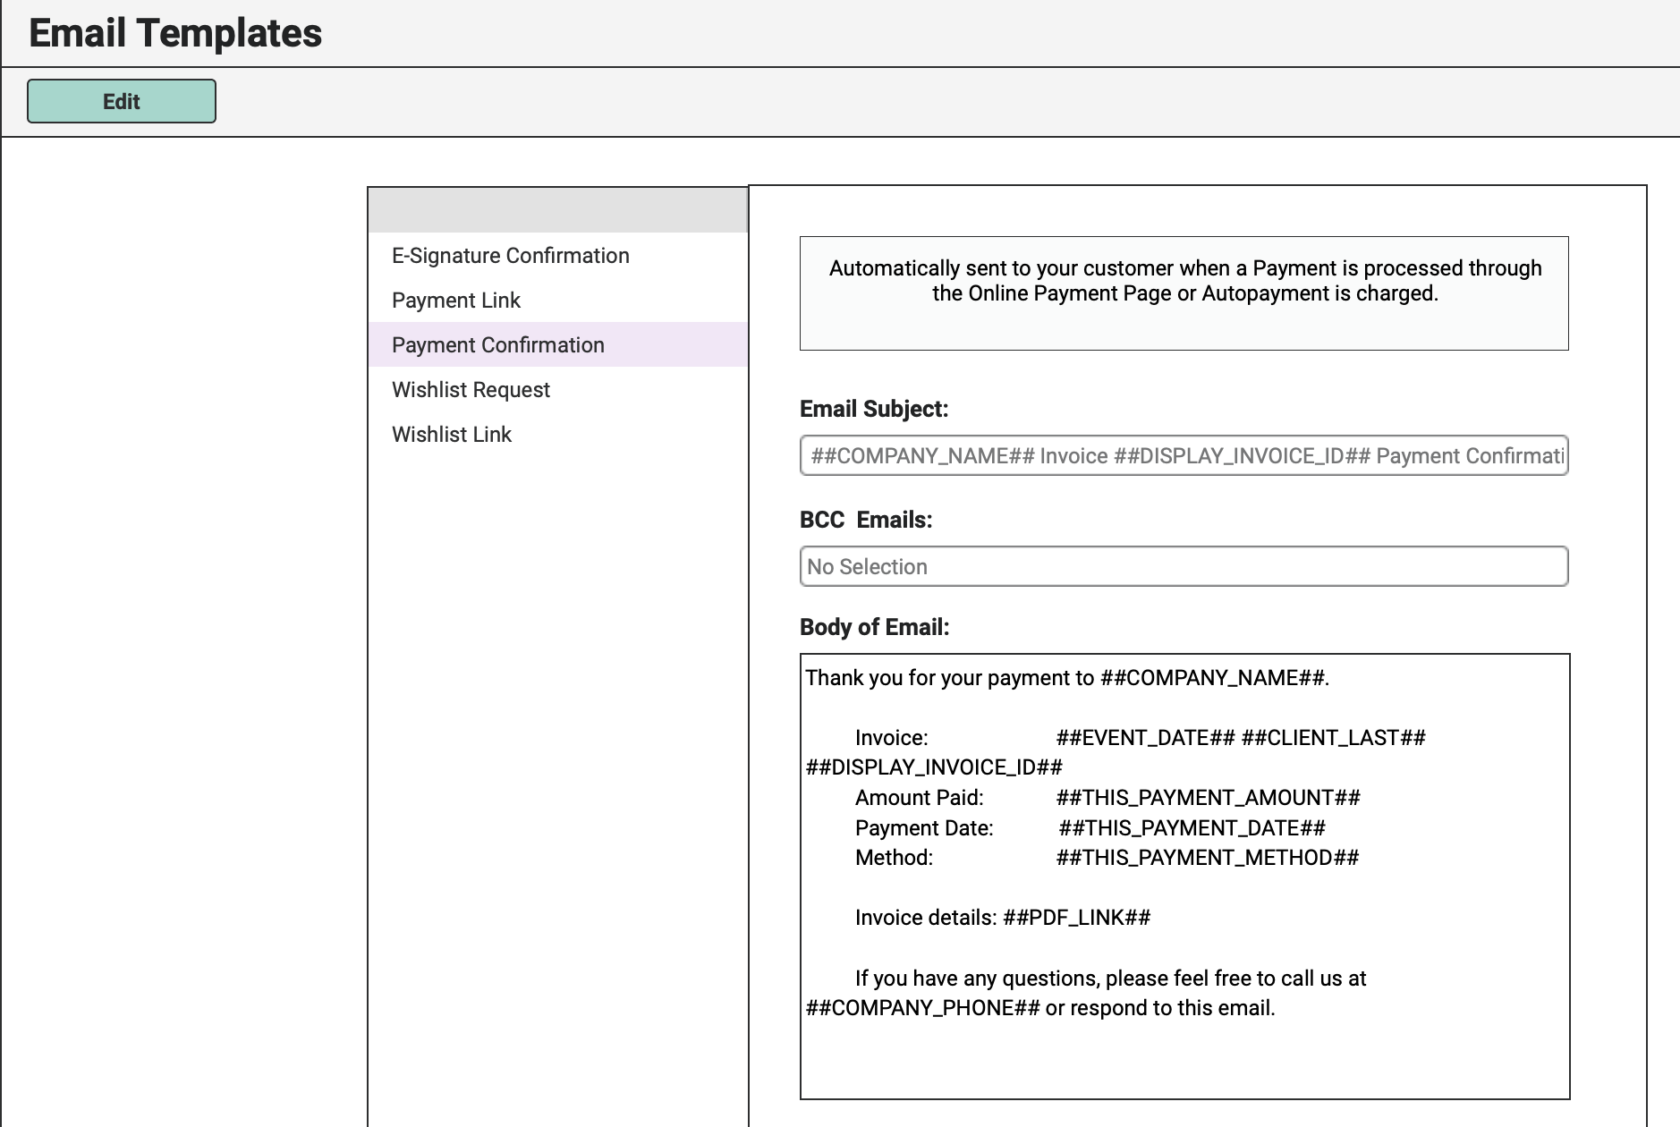
Click the green “Edit” button.
A default Subject Line and Body of the Email have already been entered here, but you can modify this email however you’d like.
Here is a list of Reference Tags you can use in the Subject Line or Body of the Email:
- Company Name ##COMPANY_NAME##
- Event Date ##EVENT_DATE##
- Invoice Number ##DISPLAY_INVOICE_ID##
- Client (First & Last) ##CLIENT##
- Client First Name ##CLIENT_FIRST##
- Client Last Name ##CLIENT_LAST##
- Invoice Total ##INVOICE_TOTAL##
- Deposit Amount Due ##DEPOSIT_DUE##
- Remaining Balance Due ##BALANCE##
- Balance Due Date ##BALANCE_DUE_DATE##
- Link to Invoice PDF ##PDF_LINK##
- Link to Online Payment Page* ##PAYMENT_LINK##
After you finish editing your email, click the green “Save” button.
A Payment Confirmation Email will be automatically sent to your customer upon completing the Online Payment process.
E-Signatures
Enable E-Signatures within your Account to collect signatures electronically.
Once E-Signatures are enabled, the Payment Link will first take your customer to the E-Signature page for Proposals to be signed.
Once they’ve signed in agreement to your Terms & Conditions, they’ll be directed to the Online Payment Page.
Now that you’re making money while you’re sleeping with Online Payment Pages, let’s kick things up one more notch with Autopay.