Navigate to the “Account” section by clicking on the icon in the upper right corner of your browser window.
Click on “Email Templates” in the column on the left.
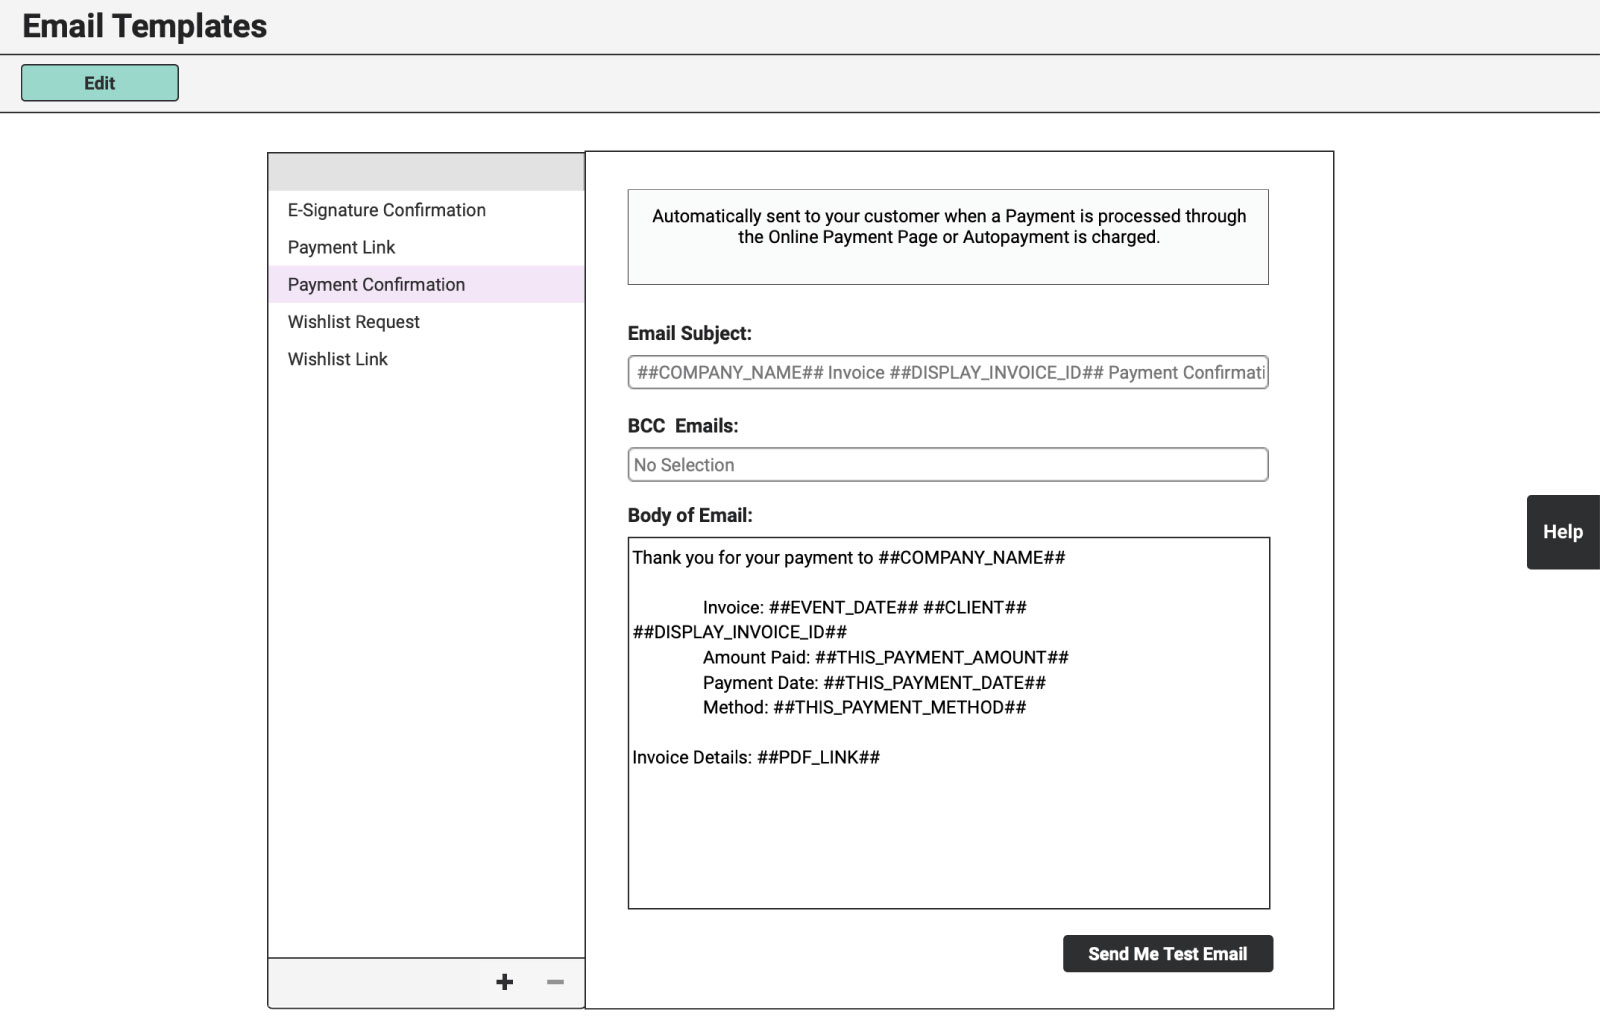
Use the “Payment Confirmation” tab to customize your message.

Modify the default text in any way you’d like but keep in mind that the Reference Tags (##COMPANY_NAME##, ##EVENT_DATE##, etc.) are meant to save you from a life of cutting-and-pasting. Even if you rearrange them or add more verbiage, you may want to include these tags.
Use the BCC (Blind Carbon Copy) field to add email addresses you’d like to receive a copy of the Payment Confirmation Email. Email addresses in the BCC field will always receive this email when it is sent out to Customers.
For instance, if you utilize a CRM alongside RW, this is a great place to enter your CRM’s unique BCC email. Customers won’t see that the email was also sent to this email address.
Be sure to separate email addresses in this field with a comma if you’d like to add more than one.
Here is a Reference Guide for the supported Reference Tags:
Company Name: ##COMPANY_NAME##
Event Date: ##EVENT_DATE##
Invoice Number: ##DISPAY_INVOICE_ID##
Client: ##CLIENT##
Invoice Total: ##INVOICE_TOTAL##
Deposit Due: ##DEPOSIT_DUE##
Remaining Balance: ##BALANCE##
Payment Due Date: ##PAYMENT_DUE_DATE##
Balance Due Date: ##BALANCE_DUE_DATE##
Link to Invoice PDF: ##PDF_LINK##
Link to Online Payment Page*: ##PAYMENT_LINK##
Amount Paid: ##THIS_PAYMENT_AMOUNT##
Payment Date: ##THIS_PAYMENT_DATE##
Method: ##THIS_PAYMENT_METHOD##
Once you have customized your email, be sure to click on the “Save Email Templates” button to activate your new clever communication.
Check out Online Payment Confirmation Emails to see an example of a Payment Confirmation Email in action.
*This feature is only relevant to users who have enabled Integrated Credit Card Processing within R.W. Elephant.
Also see: