You can send your Customers a perpetually-updating link to their Invoice PDF with RW’s One-Click Emails! That way, any time your Customer returns to that same link, they will see the most up-to-date version of their Order.
Before you start sending out emails left and right, you’ll need to set up your Email Template.
Navigate to the “Account” icon in the upper right corner of your browser window.

In the left column, select “Email Templates.”
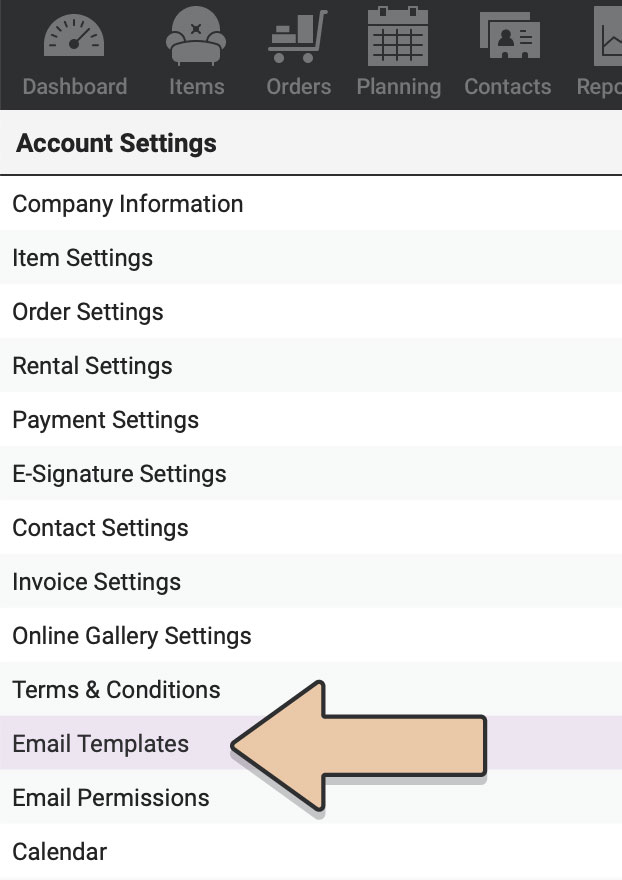
Choose “Payment Link” from the column in the Email Templates table.
The Email Subject and Body of the Email will be filled in with sample default text. Feel free to change this however you’d like.
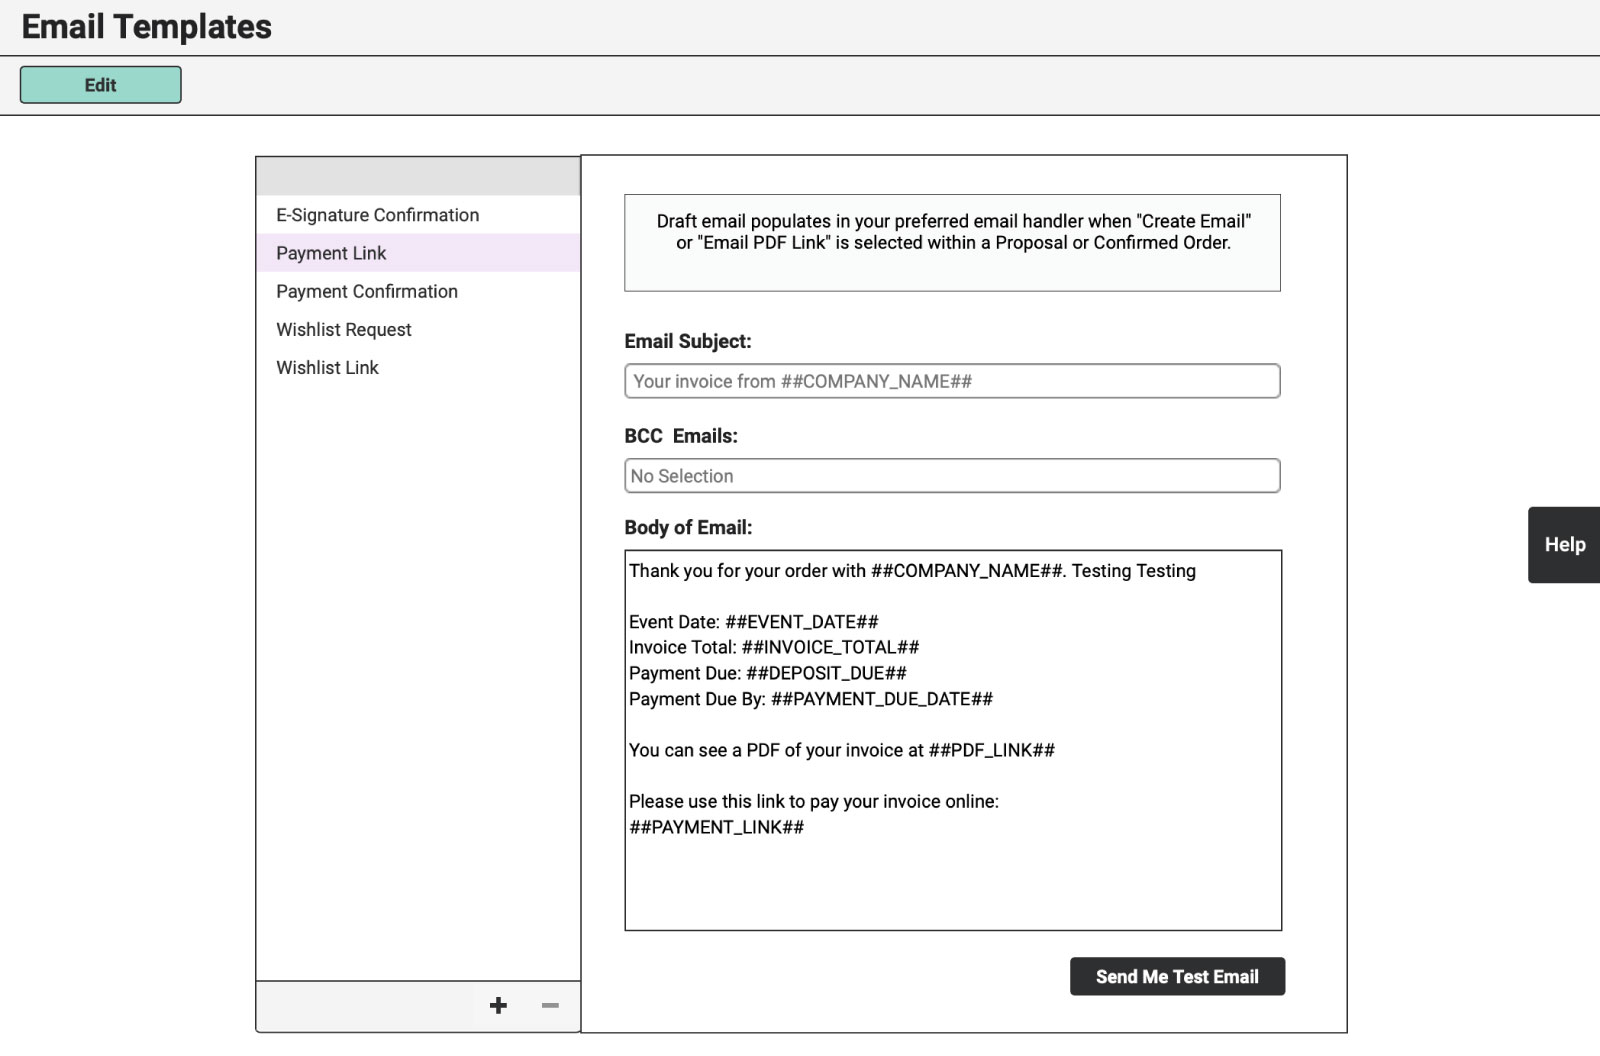
Keep in mind that you can use Reference Tags that include details specific to a particular Order. For instance, ##PAYMENT_DUE_DATE## will automatically include the Payment Due Date for the order in the body of the email.
Type two octothorps (##) to see a list of available Reference Tags that can be used in the subject line or body of the email to pull Order-specific details.
Here is a list of Reference Tags you may want to use in the subject line or body of the email:
- Your Company Name: ##COMPANY_NAME##
- Your Company Phone: ##COMPANY_PHONE##
- Event Date: ##EVENT_DATE##
- Invoice Number: ##DISPLAY_INVOICE_ID##
- Client (First & Last): ##CLIENT##
- Client First Name: ##CLIENT_FIRST##
- Client Last Name: ##CLIENT_LAST##
- Client Email Address: ##EMAIL_ADDRESS##
- Coordinator Company: ##COORDINATOR_COMPANY_NAME##
- Delivery Window: ##DELIVERY_WINDOW##
- Return Window: ##RETURN_WINDOW##
- Invoice Total: ##INVOICE_TOTAL##
- Deposit Amount Due: ##DEPOSIT_DUE##
- Remaining Balance Due: ##BALANCE##
- Payment Due Date: ##PAYMENT_DUE_DATE##
- Balance Due Date: ##BALANCE_DUE_DATE##
- Link to Invoice PDF: ##PDF_LINK##
- Link to Online Payment Page*: ##PAYMENT_LINK##
*This Reference Tag is only relevant to users who have enabled Credit Card Processing within RW Elephant.
There are other handy Reference Tags you’ll use for different Email Templates, but we’ll get to those later.
Once you’ve edited, typed, or pasted the email you want in the “Payment Link” tab, click the green “Save” button.
Now head on back to your Order by clicking on the “Orders” icon in the upper left corner of your browser window.
Select the pertinent Order from the left column.
If you need to make any changes, do that now. Otherwise, jump on over to the “Payments” tab on your Order.
In the middle of the bottom of your browser window, click on the “Create Email” button.
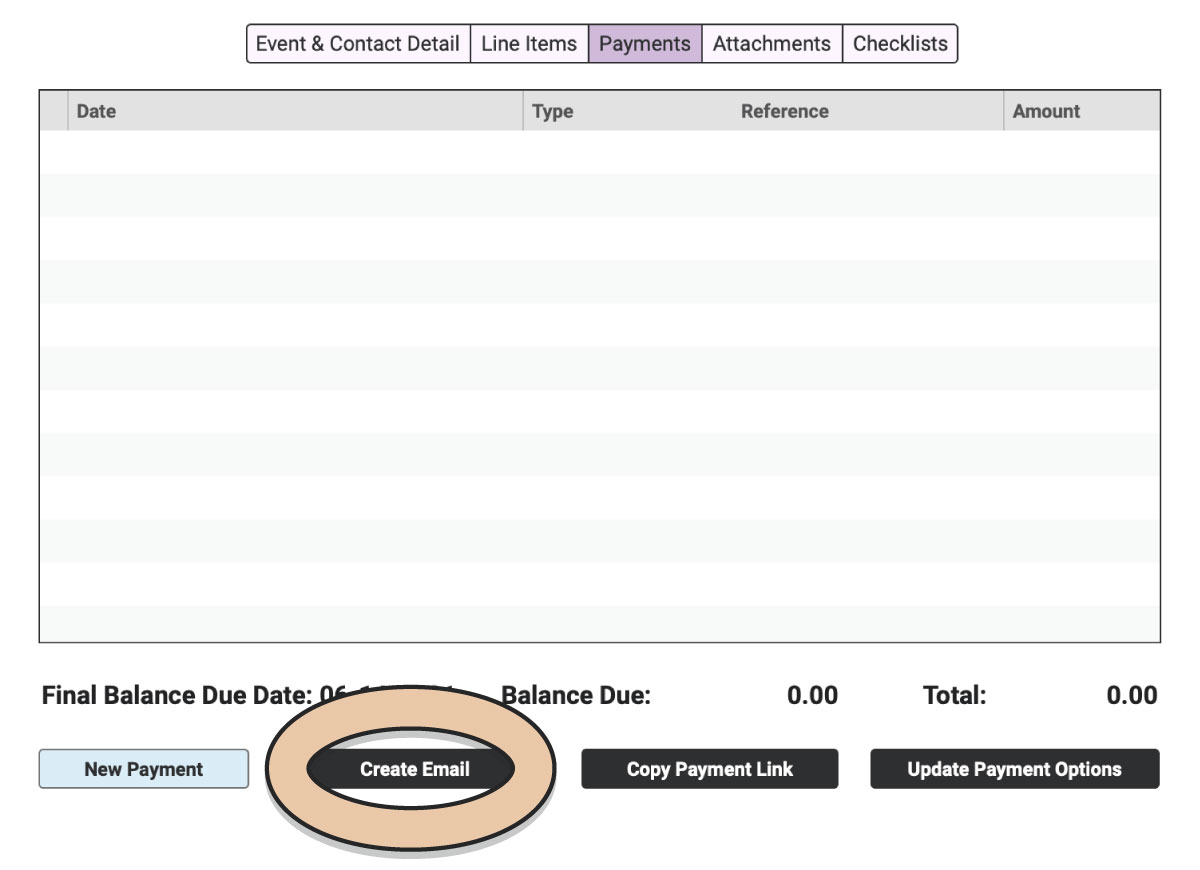
If you’ve already set up your web browser to use your preferred email client, this should open a draft email with your preferred email client.
If you haven’t set up your web browser to open mailto links in your preferred email client, go ahead and do that now.
Here are some sites to help you do just that:
- Set the default email app on Mac
- Change the program used to open email links in Firefox
- Make Gmail Your Default Email Client In Chrome, Safari, and Firefox
- How to make webmail your default email in Chrome, Firefox, and Opera
Once your email is open and populated with the text from your freshly-set-up template, you’ll be able to edit the email draft or click “Send” right away.
Now that you’ve learned how to send the Proposal to your Customer, let’s talk about what happens next: Confirming an Order. Yippee!