Use the Damaged Order Status to make Work Orders in RW Elephant.
A Damaged Order allows you to create an Off-the-Shelf and Restock Time, add an Item (or Items) that need to be repaired, and store the information for your crew or contractor.
You can create Damaged Orders manually or use the Damaged and Missing Item Workflow to jumpstart the process and automatically create them.
Manually Create Damaged Orders
Within Orders, click the “+” button in the upper left corner to create a new Order.
Click the green “Edit Order” button.
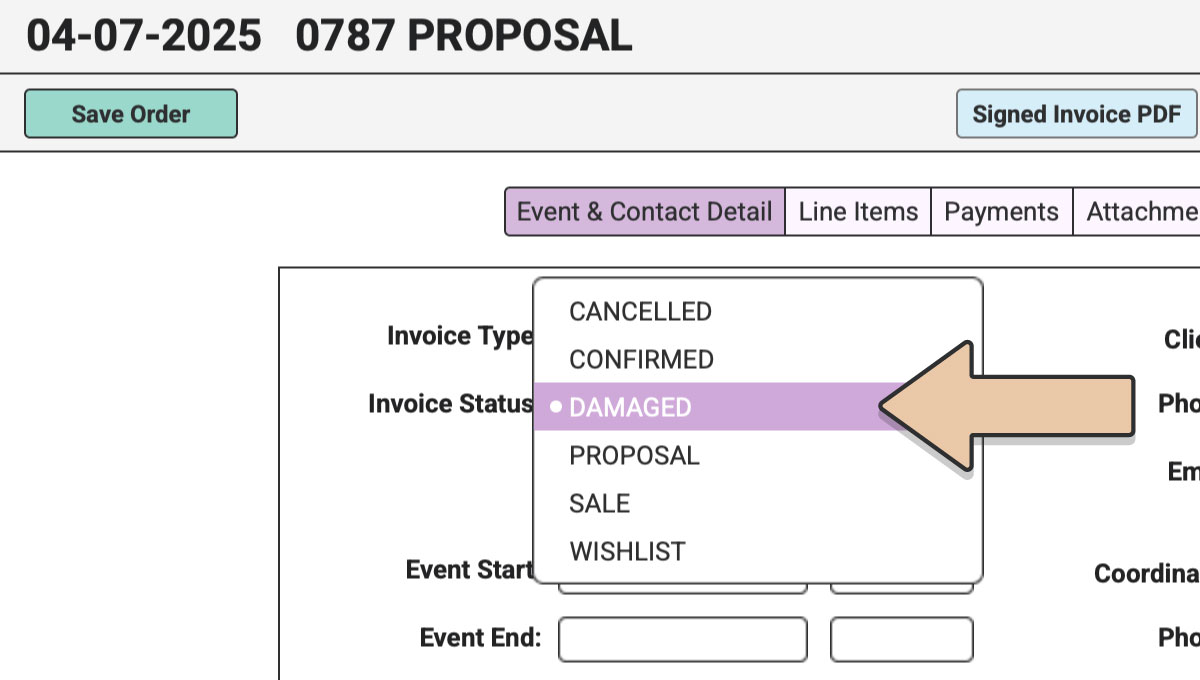
Start by changing the Invoice Status to “Damaged.”
Enter the start date the Item is out of commission as the Event Start.
You can leave the Delivery and Return Windows blank.
Enter the length of time it will take to repair the Item as the Off-the-Shelf and Restock Times.
Because the Damaged Order will use the Off-the-Shelf and Restock Time to determine availability, you’ll be able to see if there are any conflicts. You can then decide to speed up your repair process or replace the Item on any existing Orders.
Enter the Client on the Order as someone consistent. For instance, yourself, your warehouse manager, your upholsterer, etc.
Click the green “Save Order” button.
Head to the Line Items tab and add the damaged Item to the Order.
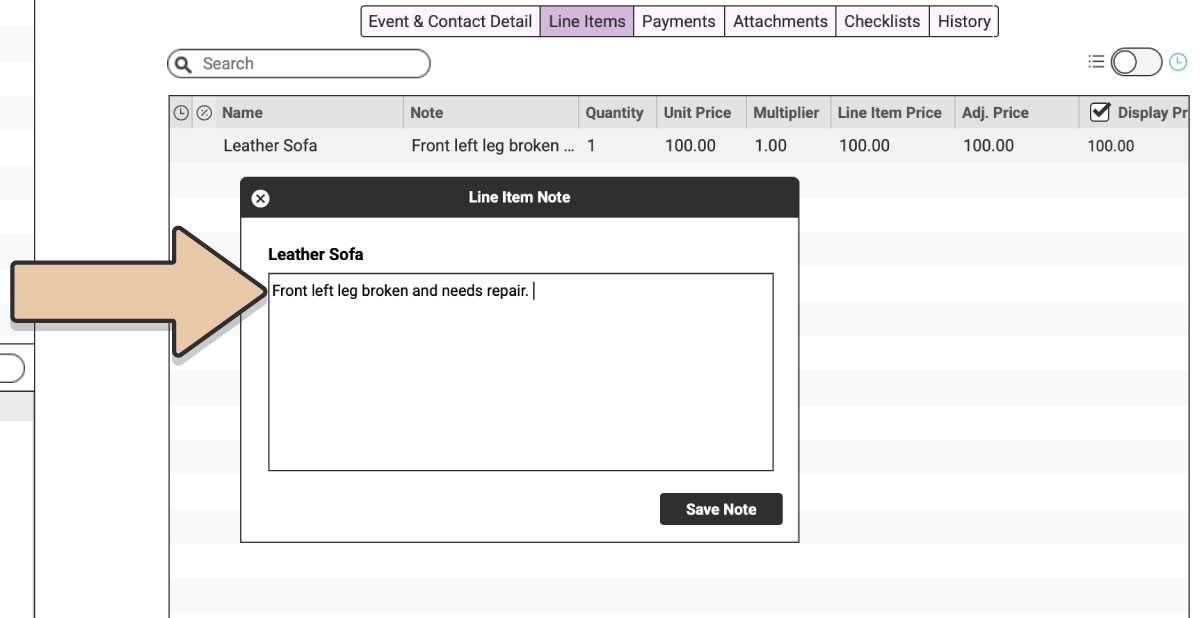
Now enter any notes about the damage in the Line Item Note. Give specific details to your crew so they know exactly what needs fixing.
Change the “Unit Price” to 0.00.
Click the green “Save Order” button.
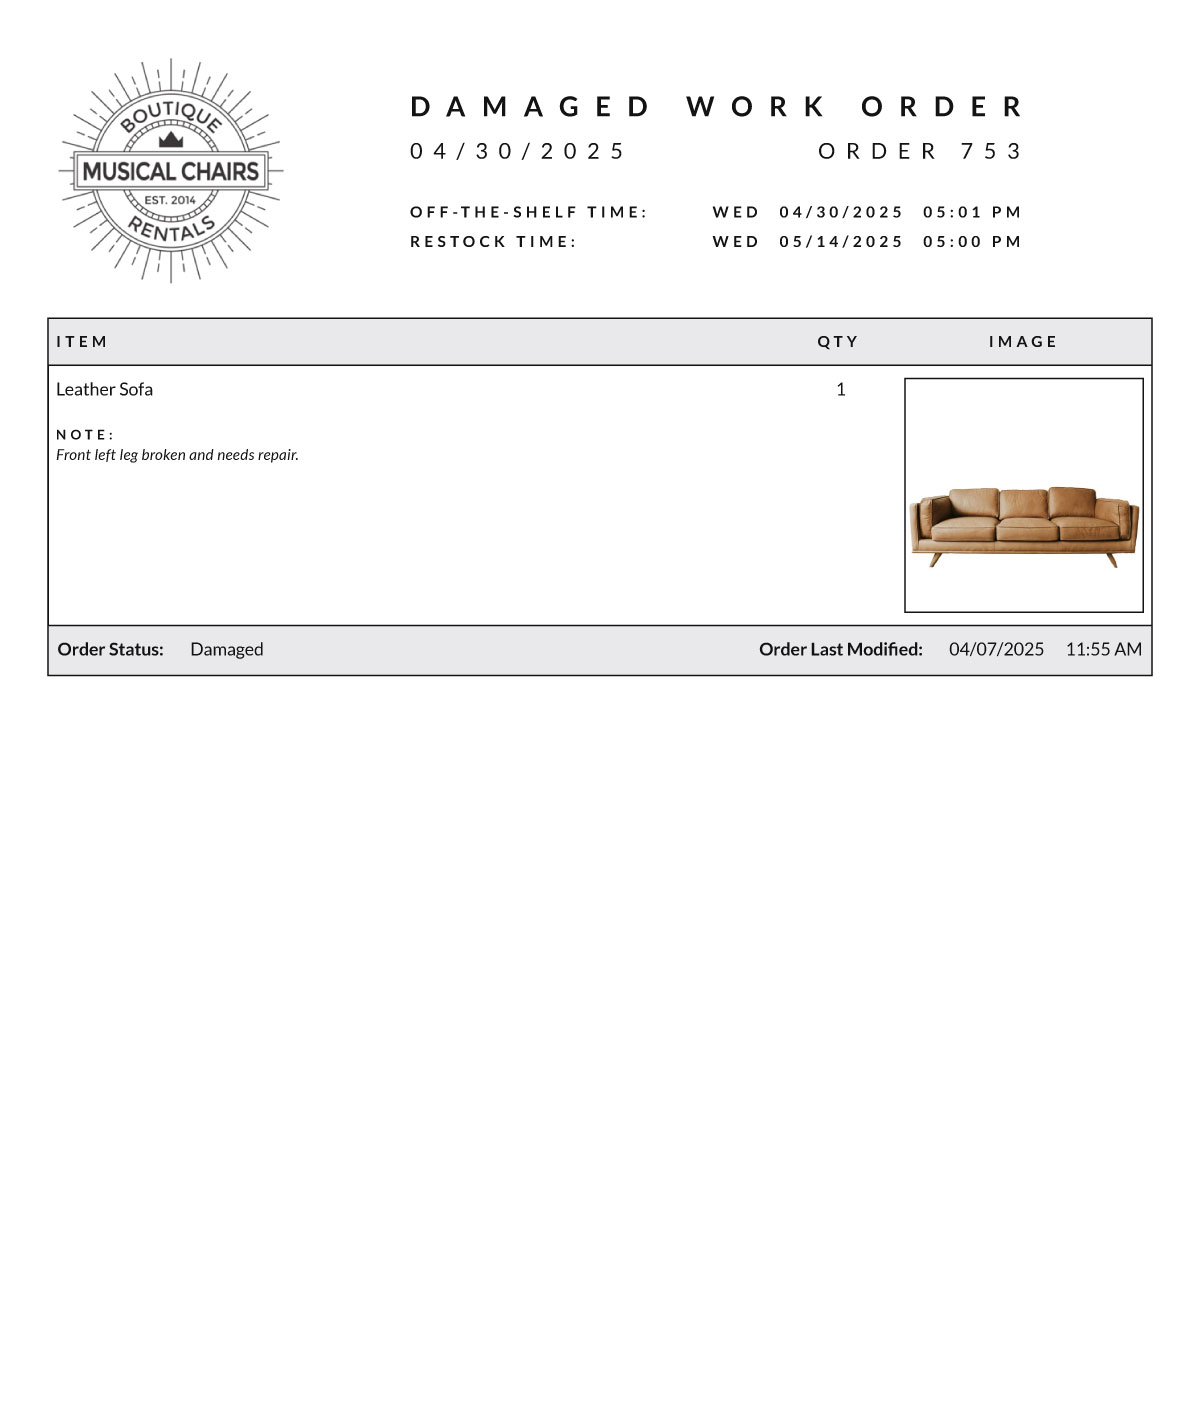
Click the “Invoice PDF” button to generate your Damaged Work Order PDF.
The PDF will display the time frame for the repair, the Item, and its notes. Share this Work Order with your maintenance team so they’re clear on the repairs needed.
When the Item repairs are complete, come back to this Damaged Order and change the Restock Time to the moment it is ready to be rented out again.
Damaged & Missing Item Workflow
Jumpstart the process of creating Damaged Orders with RW’s Damaged & Missing Items Workflow.
Head to the original Order where the Item was damaged. From the Line Items tab, select the Item and right-click on it.
Select “Damaged or Missing…”
This will open a Damaged/Missing Item pop-up to manage the damage.
For this example, we want to automatically create a Damaged Order, so we’ll select “Damaged – Repairable.”
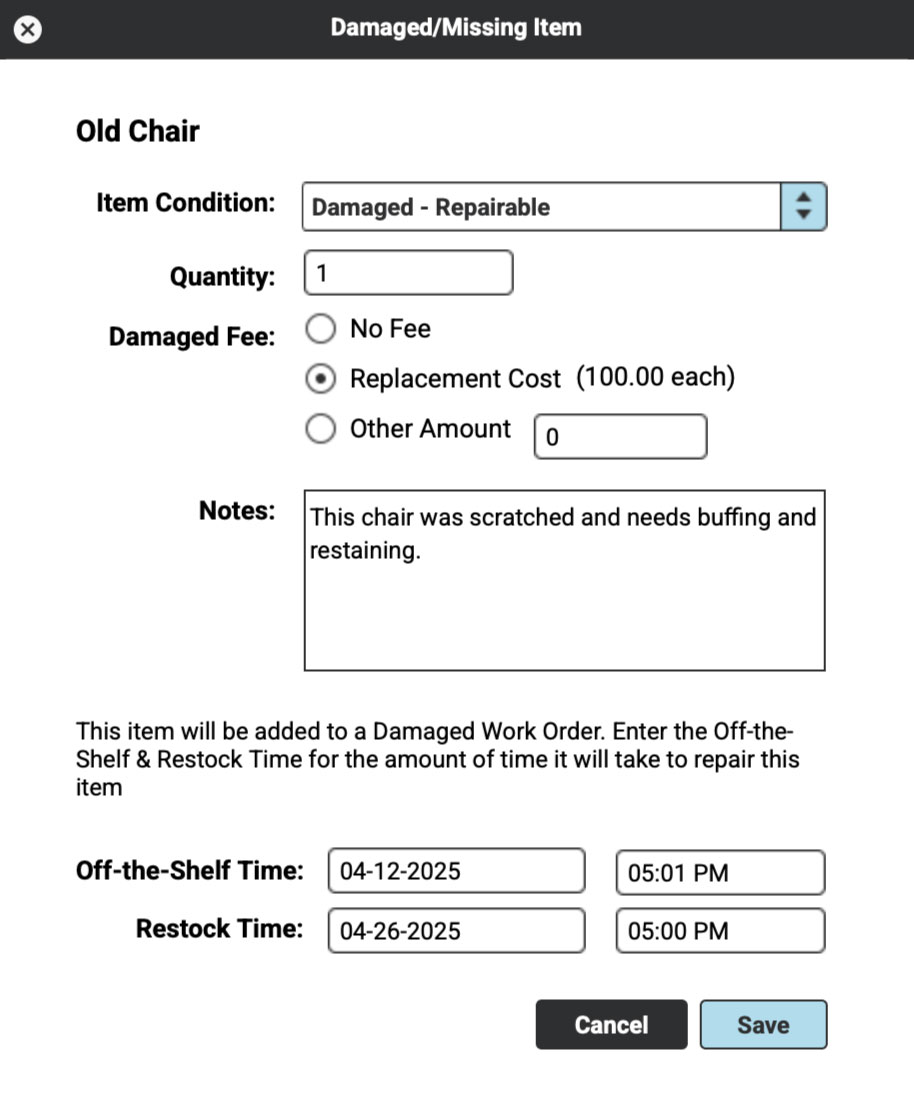
Enter the Quantity of the Item that needs repairs.
Now decide if you’ll pass along a fee to your customer or not. Choose whether that is no fee, the Replacement Cost of the Item, or a manually entered amount.
In the Notes field, enter any notes you want to appear on the Damaged Work Order about the Item.
Lastly, enter the Off-the-Shelf and Restock Time of the new Damaged Work Order. Remember, this is the amount of time it will take for the Item to be repaired. By default, RW will estimate 2 weeks from the moment it is restocked from the original Order. Change it to a realistic time frame for your team.
Click the blue “Save” button.
If there are no conflicts, you’ll receive a pop-up stating the Item was added to a Damaged Order.
If there are conflicts, you’ll receive the standard conflict pop-up. Use the Item Usage Quick Display to identify when the Item can be repaired and if it needs to be replaced on upcoming Orders.
Damaged Repairs
To see a comprehensive list of all the Items on Damaged Orders, head to “Planning” and select “Damaged Items” and then “Damaged Repairs.”
This table view will list all of the Items that are on Damaged Orders by Item Name as well as their Order Numbers and Off-the-Shelf and Restock Times.
Be sure to check out our Dealing with Damaged Items Tutorial to find out how to best use Damaged Orders.
Also see support articles about Proposals, Confirmed, Completed, Cancelled, Wishlists, & Sale Orders