The Subrental tick box allows you to distinguish which Items belong to you and which Items you Subrent from an outside source.
Navigate to the “Items” icon in the upper left corner.

Select an existing Item or create a new Item.
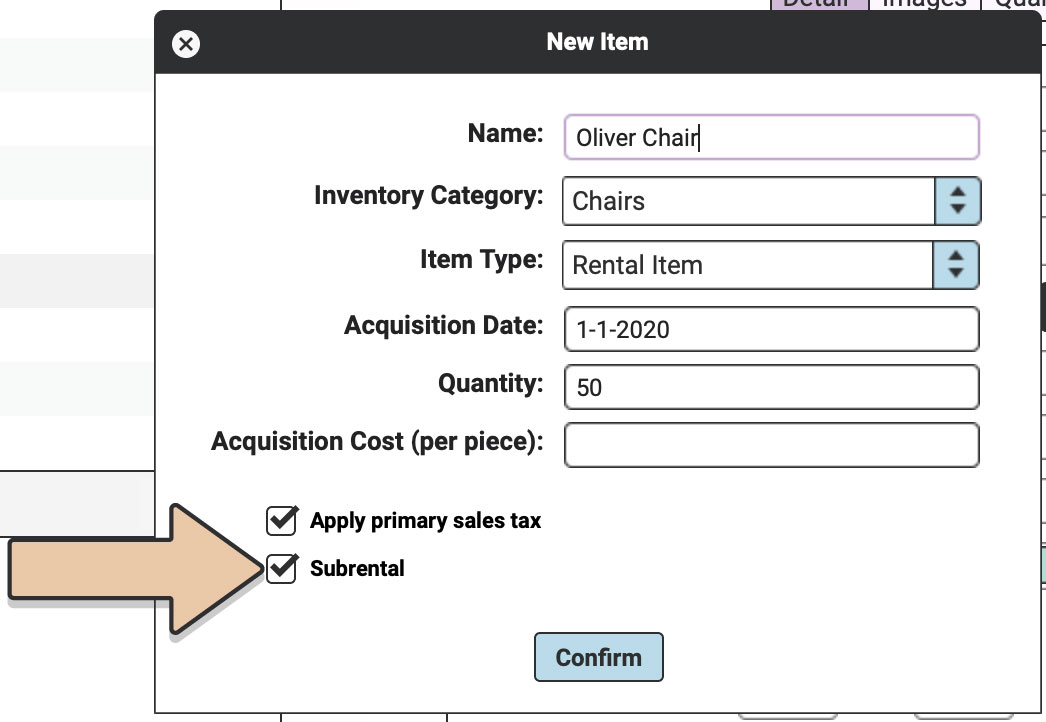
If creating a new Item, in the new Item pop-up, enter the Item Name, Category, the date you’ll first be subrenting the Item, and the quantity available.
Then be sure to tick the “Subrental” tick box.

Now click “Confirm.”
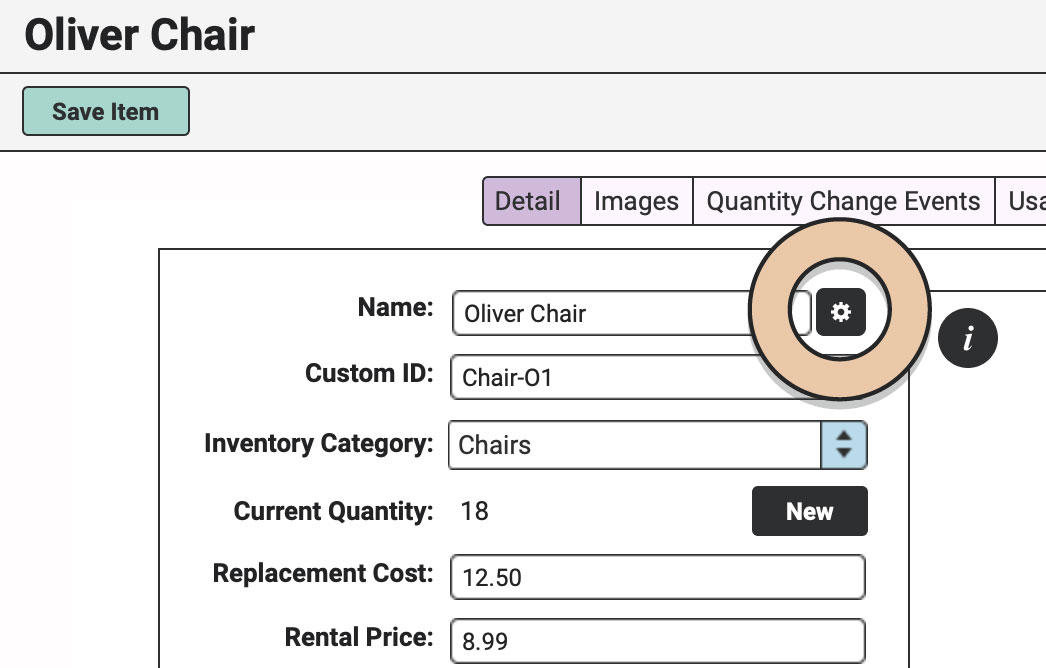
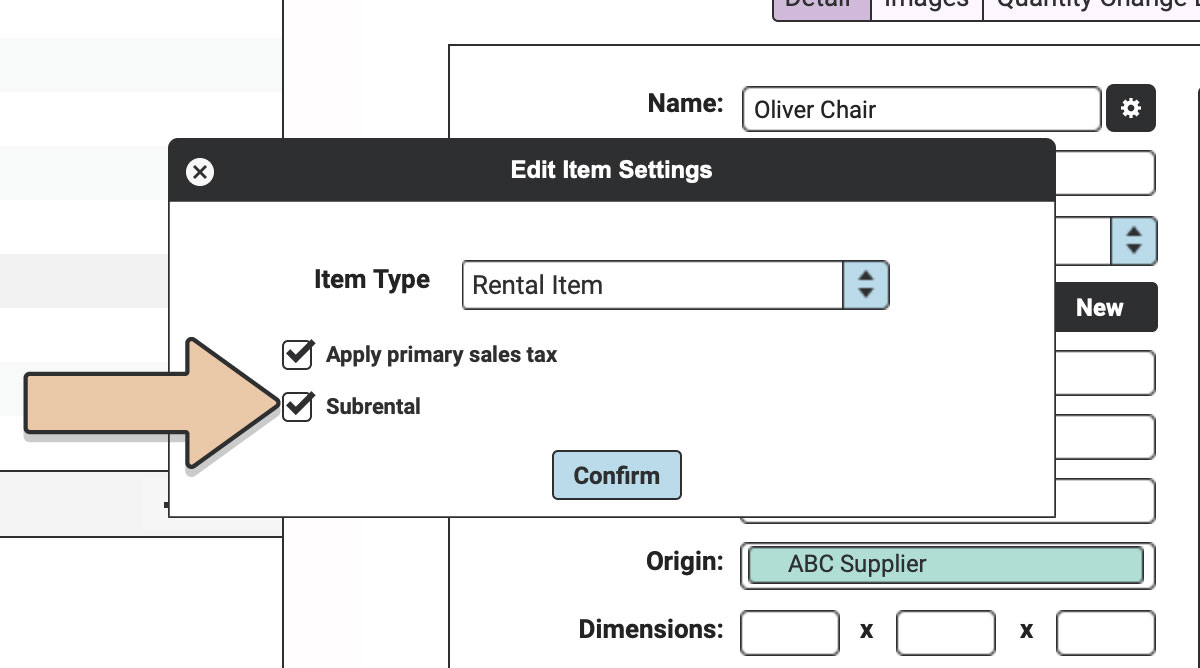
Update an existing Item by heading to the Item Settings icon next to Item name.

Only Rental Items can be Subrentals.
If the Item is a “Rental Item,” the Subrental tick box will appear in the pop-up.

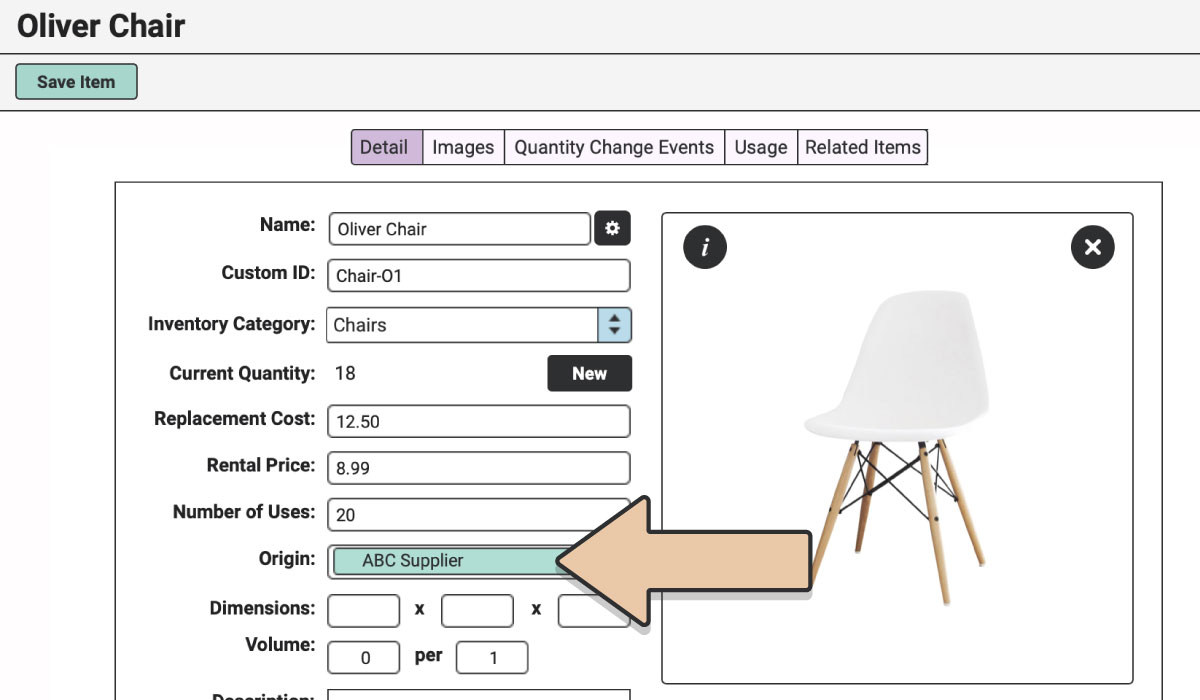
Include an Image, Rental Price and any other info as you normally would.
Also be sure to include the Origin of the Item so you know where you get this piece from.

You’ll be able to add Subrental Items to Orders just like any other Items.
Once you start using Subrentals, you will need to pull the Subrentals Report on a regular basis to be sure you’ve reserved those items from your supplier.