To edit your Payment Settings, navigate to the “Account” icon in the upper right corner of your browser screen.
In the left column, click on “Payment Settings.”
Click the green “Edit” button at the top of your browser window.

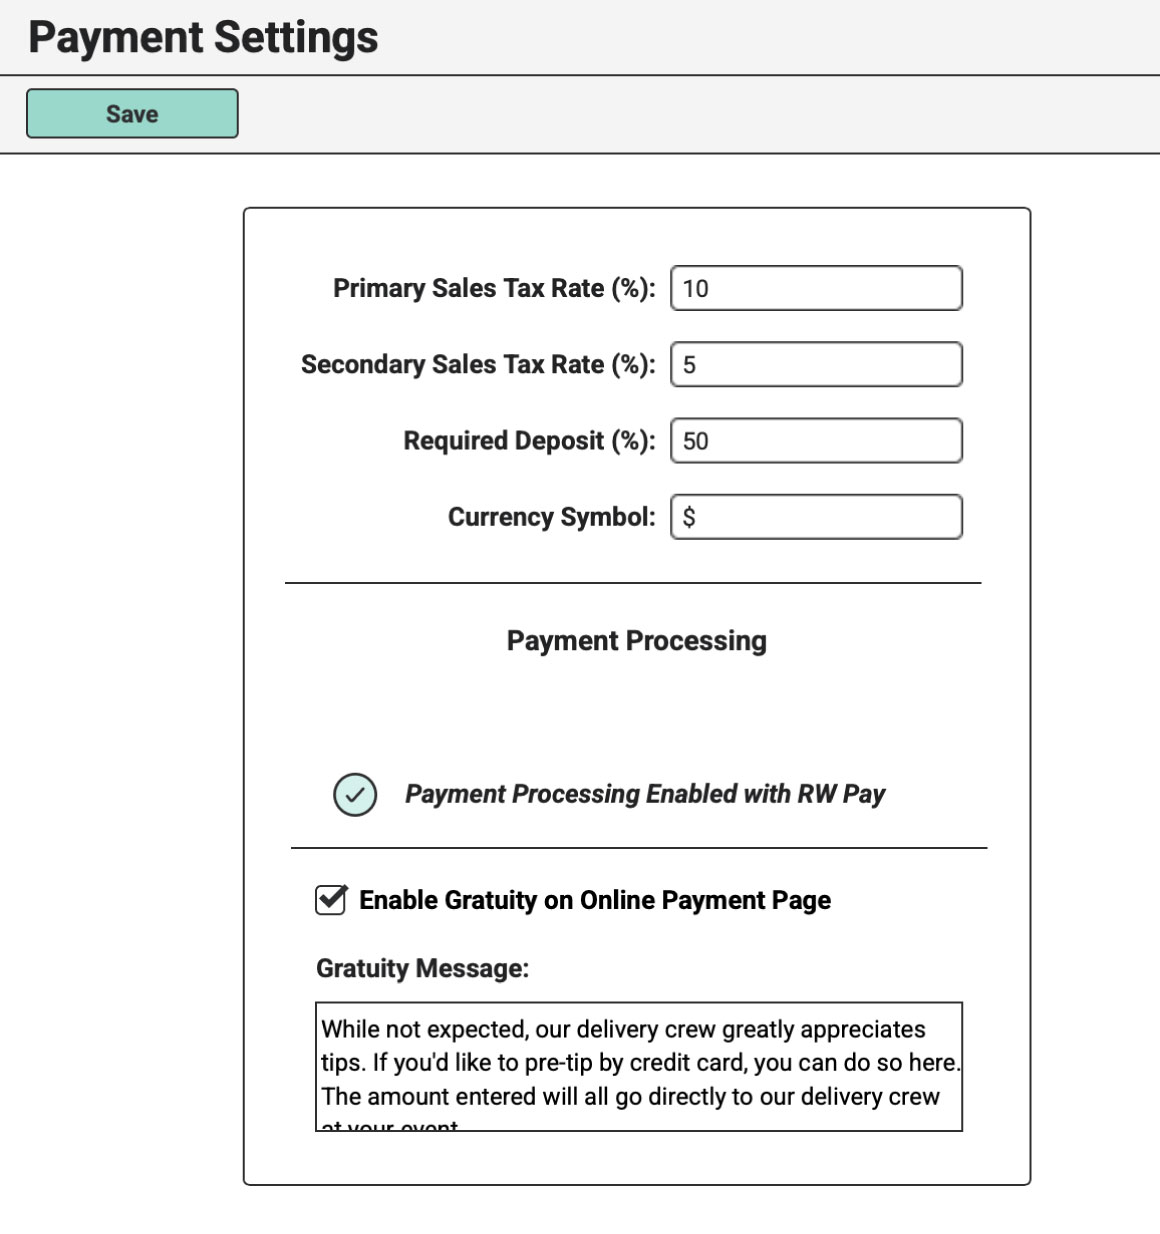
Enter your default Sales Tax Rate in the first field (as a percentage). So, if you collect 8.75%, you’ll enter “8.75” here.
Should your region or province require multiple tax rates on a single Invoice (i.e. PST & GST), you’ll want to enter a Secondary Sales Tax Rate. Leave this blank if not. To generate the “Secondary Sales Tax” label on the Invoice, you’ll want to enter a name in the “Secondary Sales Tax” field under Template Labels.
However, if you have to collect Variable Sales Tax Rates (a single rate that differs from Invoice to Invoice), be sure to watch the Tax Items Tutorial in the Super Simple Step-by-Step Set-up System.
In the next field, enter the Minimum Initial Deposit Percentage you require to confirm Orders. For instance, if you require Clients to pay 50% upfront, enter “50.”
By default, your Currency Symbol will be set to dollars ($), which will display on your Invoice PDFs. Feel free to change this to the currency most applicable in your region.
To enable Integrated Credit Card Processing within your RW Elephant account (which also allows for Online Payment Pages and Autopay Features), click on the “Connect with RW Pay…” or “Connect with Stripe…” (for international users) button to start that process. Check out the Integrated Credit Card Processing Tutorial for more information about setting that up.
Users who process payments with RW Pay can enable Gratuity on their Online Payment Pages. Tick the box to enable Gratuity, then enter the message you would like to display in the Gratuity section of the Payment Page.
Be sure to click the green “Save” button when you’re done editing your Payment Settings to save your changes.