Within RW Elephant, Orders start as Proposals and can then become Confirmed (when your customer agrees to your Terms AND gives you a payment) or Cancelled (the customer decides not to move forward with the Order). Once an Order is Confirmed, it will always stay Confirmed (never become “Cancelled”).
This is by design—so you can never accidentally cancel an Order that should remain Confirmed, and also because once you’ve received a payment, you’ll always want to maintain a record of that payment rather than delete it as if it never happened.
(If, however, you’ve entered a payment as a mistake, please check out this article on how to delete a payment.)
Before we dive into the steps, determine whether you are making a full or partial refund.
Refund Payment Record
Go to the “Orders” icon in the upper left corner of your browser window.
Select the pertinent Order from the left column.
Click the green “Edit Order” button
Click the “Line Items” tab.
You will need to delete all of the Line Items. Do this by selecting the first Line Item then hold the Shift key and click on the last Line Item. All of the Items should be selected.
In the bottom right corner, click the “Delete Selected Line Items” button.
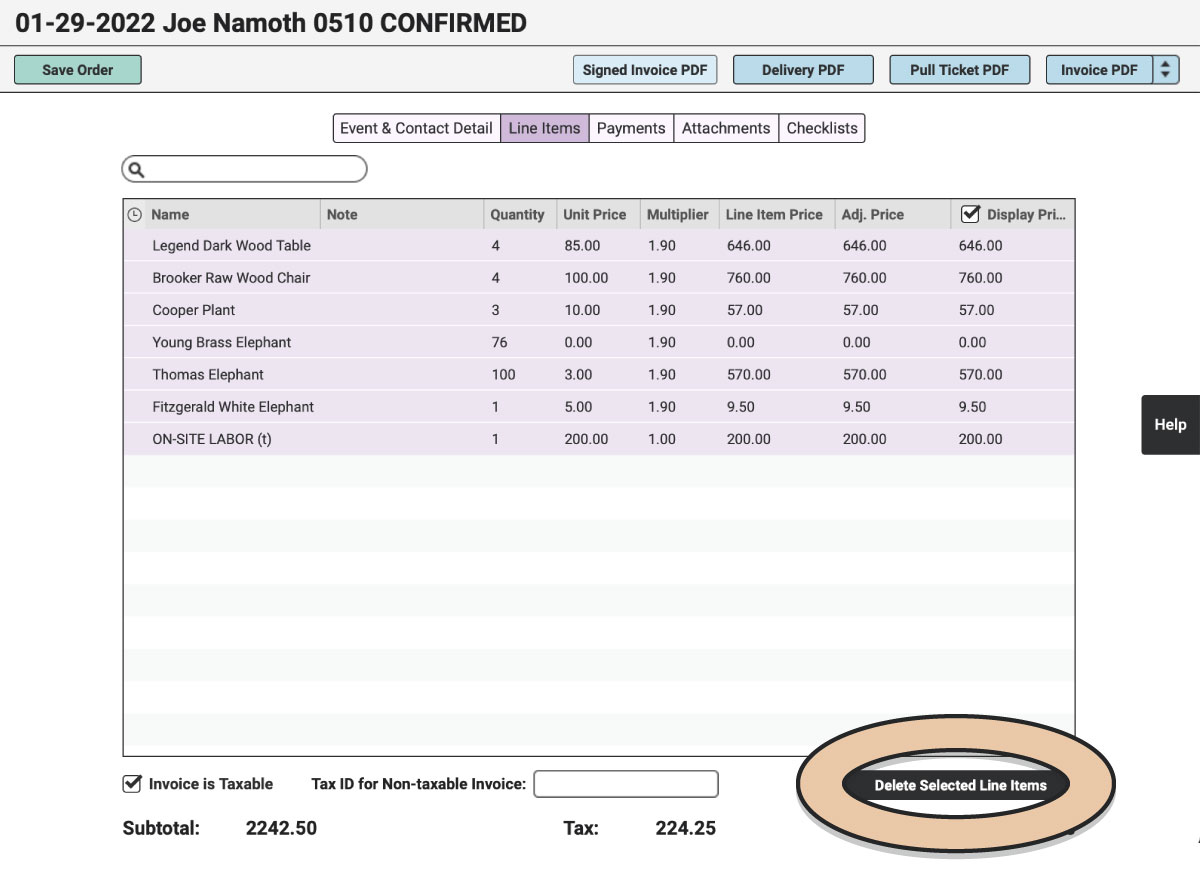
If you are making a partial refund, after you have removed all the Line Items, add a fee (e.g. “Staging Fee” or “Cancellation Fee”) to the Line Items list. See more about Fees here. Be sure this is a Flat Fee rather than a Percentage Fee.
Change the “Unit Price” to the amount of the payments you’re keeping.
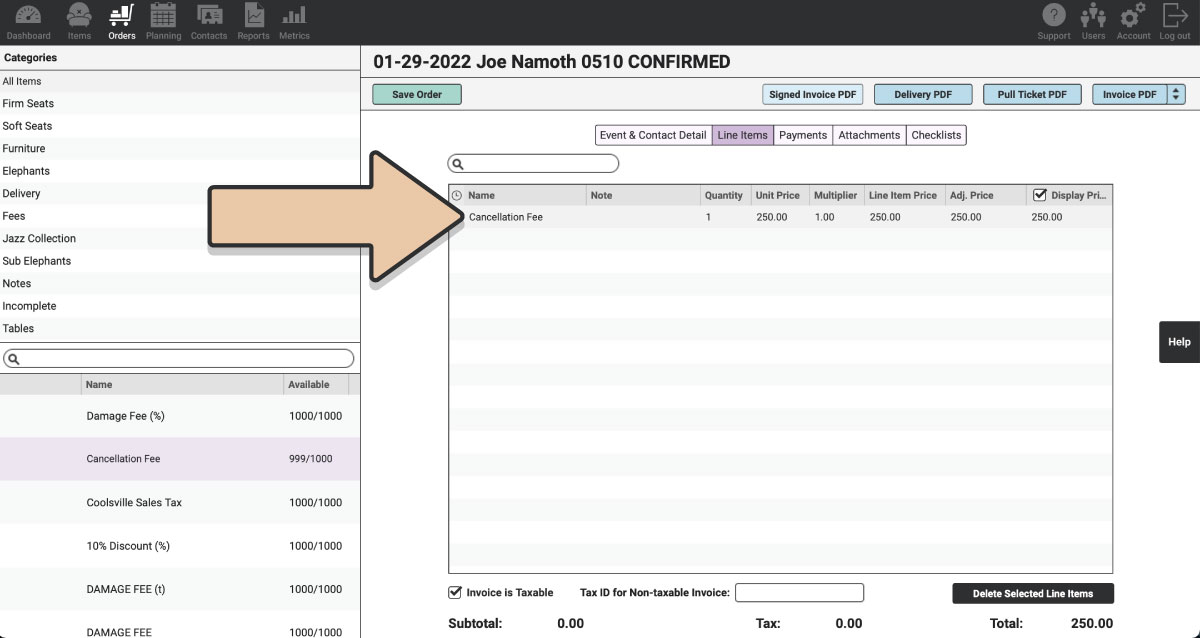
Click the green “Save Order” button.
Once you have removed all of the Line Items from the Order (and added your fee if necessary), the balance due will be a NEGATIVE integer (reflecting the customer’s original payment less your fee).
Leave the Order as Confirmed. That way you will maintain a record of the Payments and Refunds for accurate accounting, but you will also have released all of the Items for rental on other Orders.
Click the “Payments” tab.
Click the green “Edit Order” button.
Click the “New Payment” button.
Select the payment ”Type” in the drop down menu.
Please note that you can make the refund in cash even if the original transaction was by check or credit card. However, if the credit card transaction was processed using RW Pay (or Stripe), the refund will also need to be processed through RW Pay (or Stripe). To do this, scroll further down.
Select “Full Balance.”
This will appear as a negative integer of the amount to be refunded.
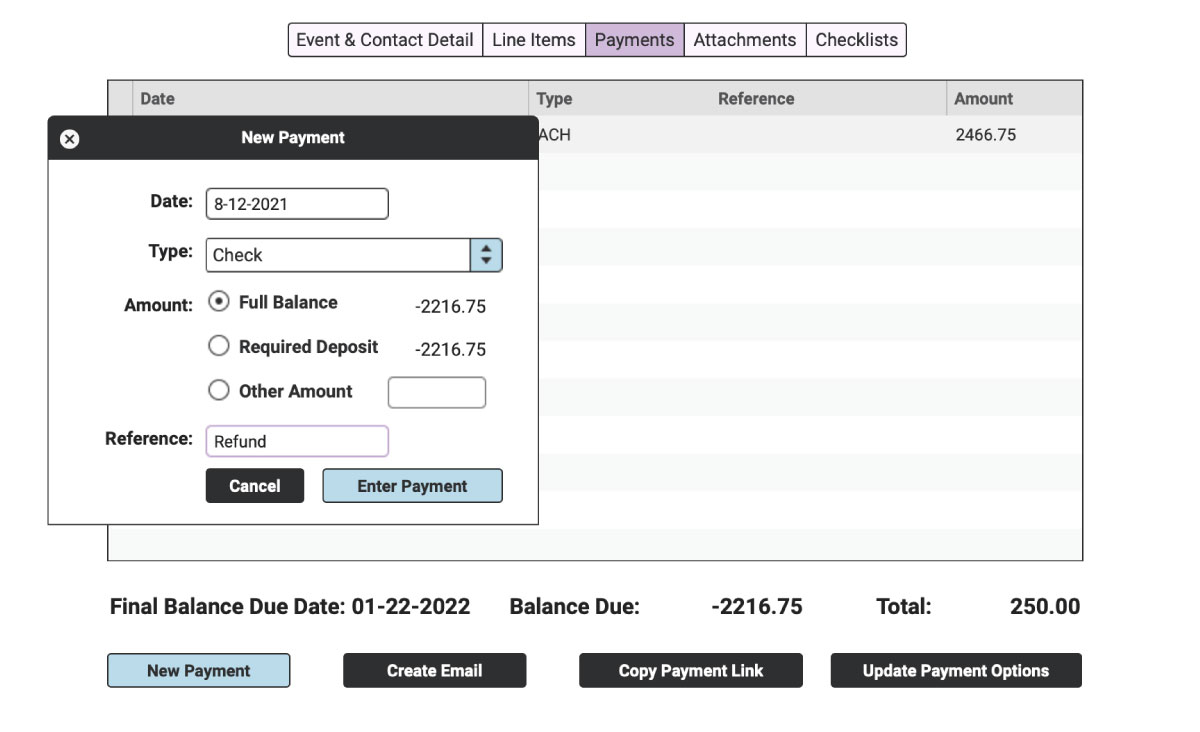
In the “Reference” field, you can enter something like “Refund” or the number of the check you’re writing to your customer.
Click the “Enter Payment” button.
Click the green “Save Order” button.
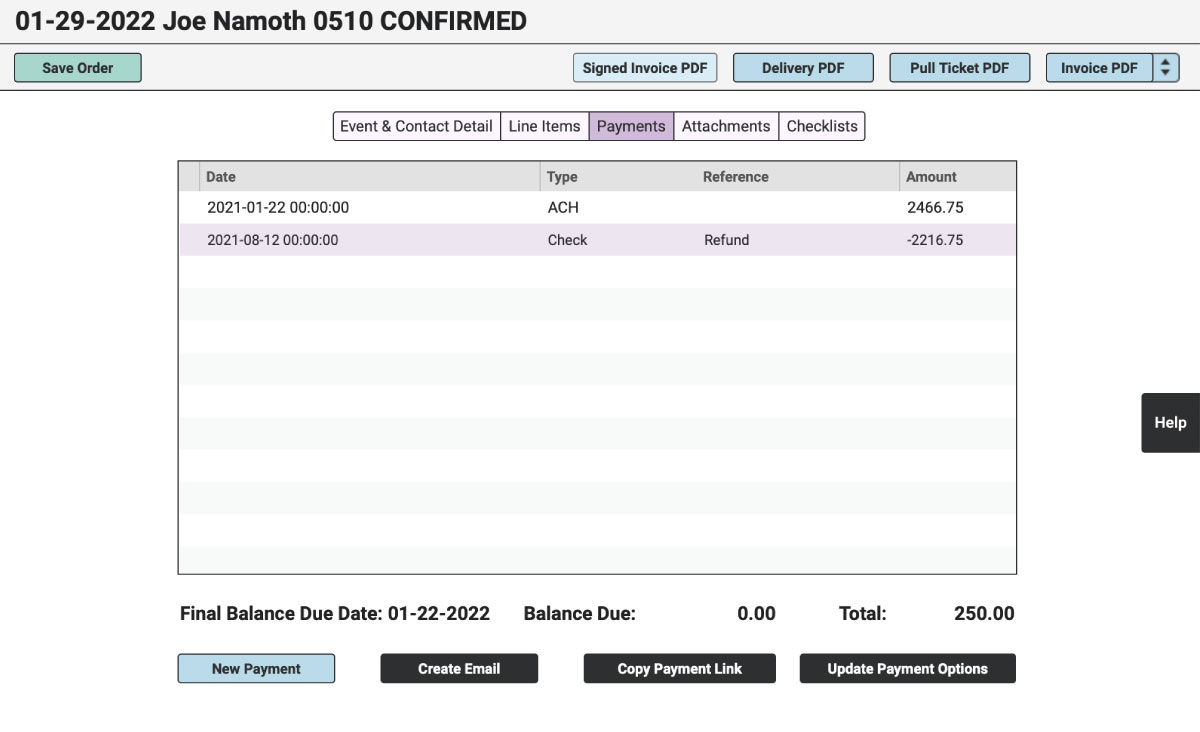
You’re all set! Your refund will now appear in the list of payments for the Order.
Refunding a Credit Card or ACH Payment
If the original payment was processed using RW Pay or Stripe, to issue a refund, you’ll need to select “Refund a Payment” from the “Type” drop-down menu.
In the “Other Amount” field enter a POSITIVE amount since RW knows it’s a refund.
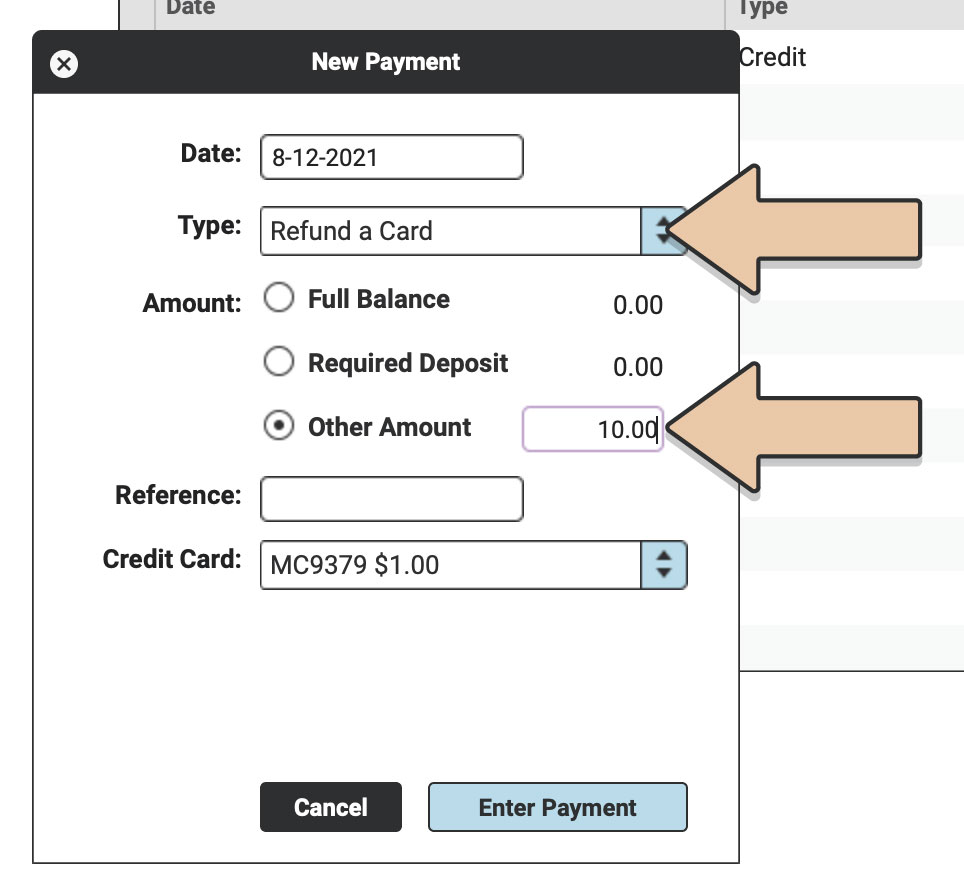
From the “Credit Card” drop-down menu, select the transaction you’d like to apply the refund to. Please note that the amount of the refund must be equal to or less than the amount of the original transaction.*
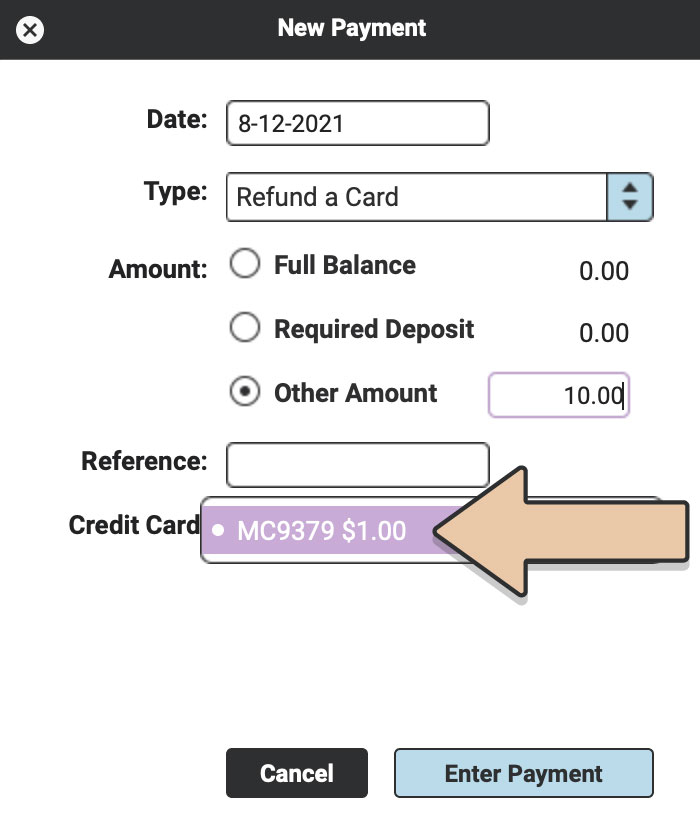
Click the blue “Enter Payment” button.
Click the green “Save Order” button.
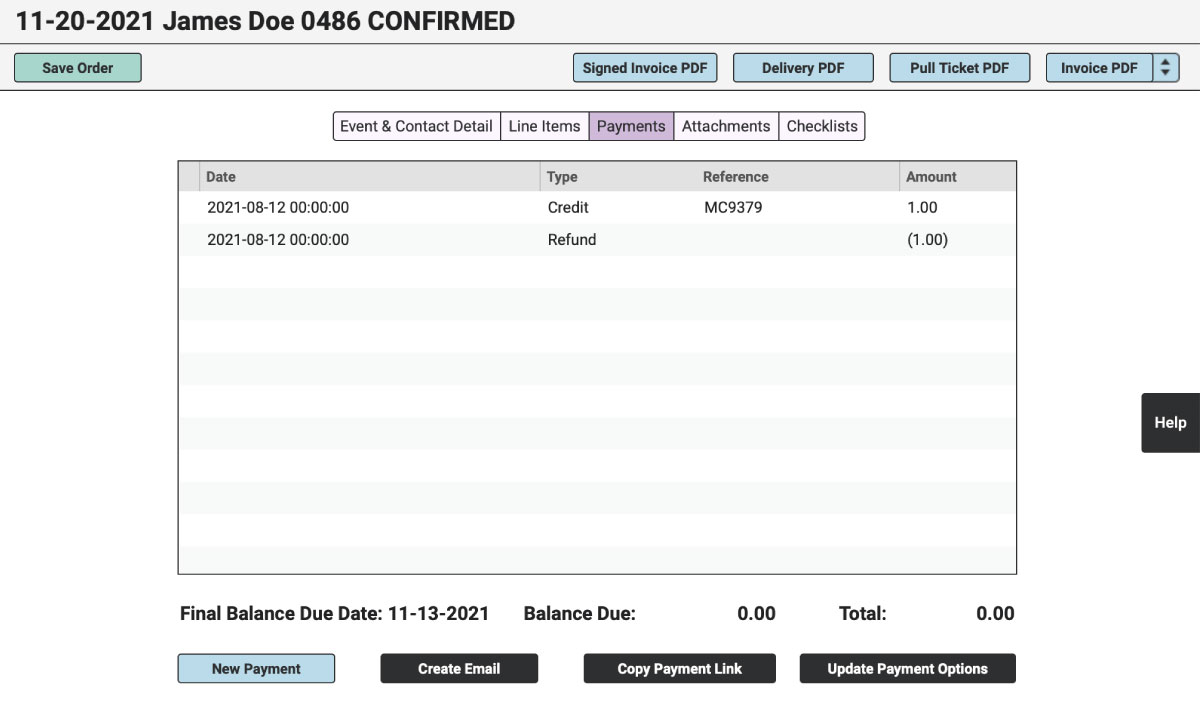
Your refund will be processed through RW Pay (or Stripe) and will appear in the list of payments for the Order.
*If the refund needs to be for more than the amount of the original transaction, you’ll need to split up the amount into multiple refunds and apply them to the original transactions. For instance, if you received two payments of $100 and want to refund all $200, you’ll need to issue one refund for $100 towards the first transaction and another refund of $100 towards the second transaction.
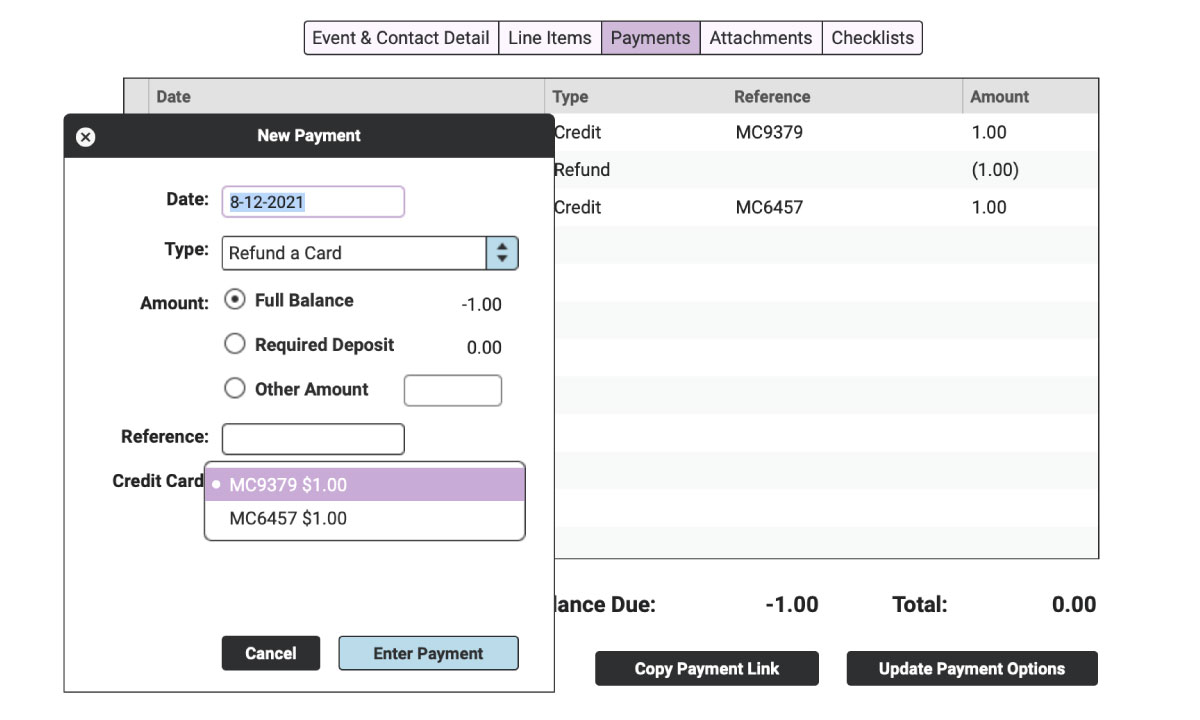
Now you have a record of your transactions.
Way to rack up your accounting skills!