Item Variations are a way to group your Items so that customers can more easily select products while perusing your Online Gallery.
When organizing your Items, you’ll first want to decide the common denominator you want to group the Items by. Is it color? Size? Type? Collection? Shape?
The common denominator you decide will be your Parent Item.
Parent Items can then have endless variations, which we call Child Items.
Creating Item Variations
To start with Item Variations, you’ll create or navigate to the first Child Item variation.
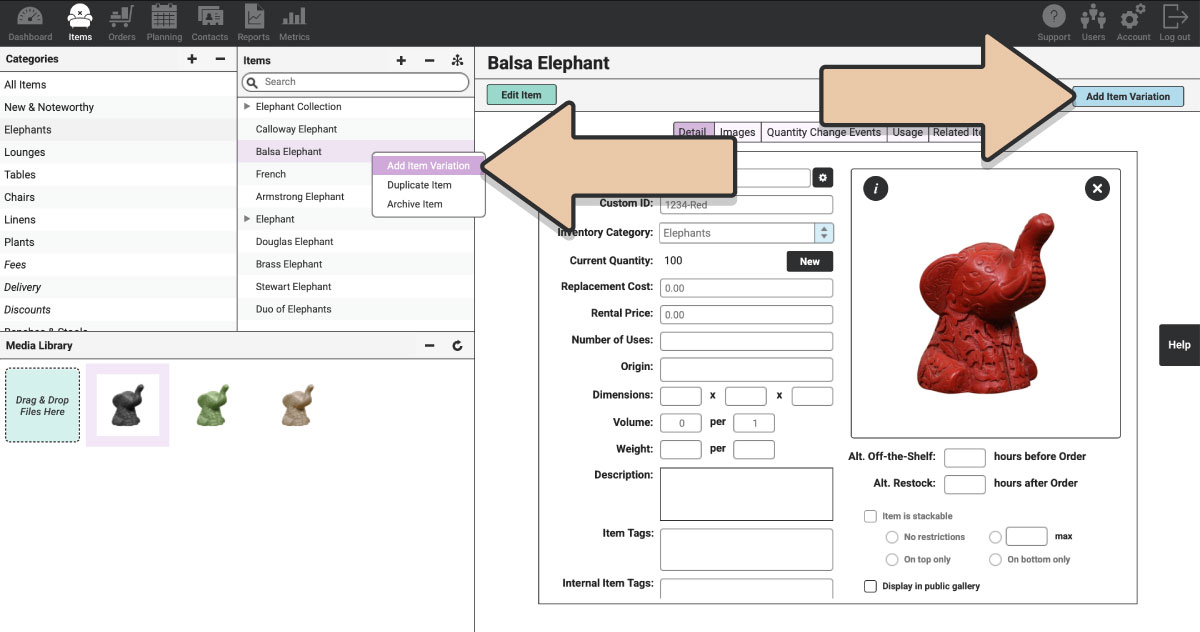
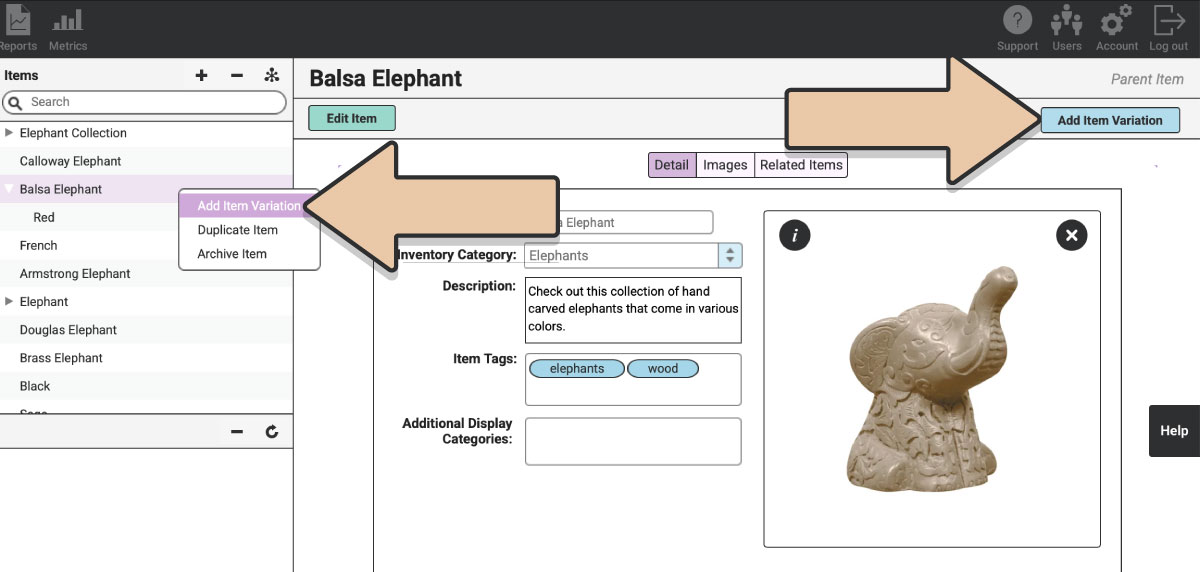
Once you’ve created that Item, you can turn it into a variation in one of two ways:
- Select the blue “Add Item Variation” button in the upper right corner of the Item view
- Right-click on the Item name in the second column and select “Add Item Variation”
This will create a new Parent Item, and the original Item will become the Child Item Variation.
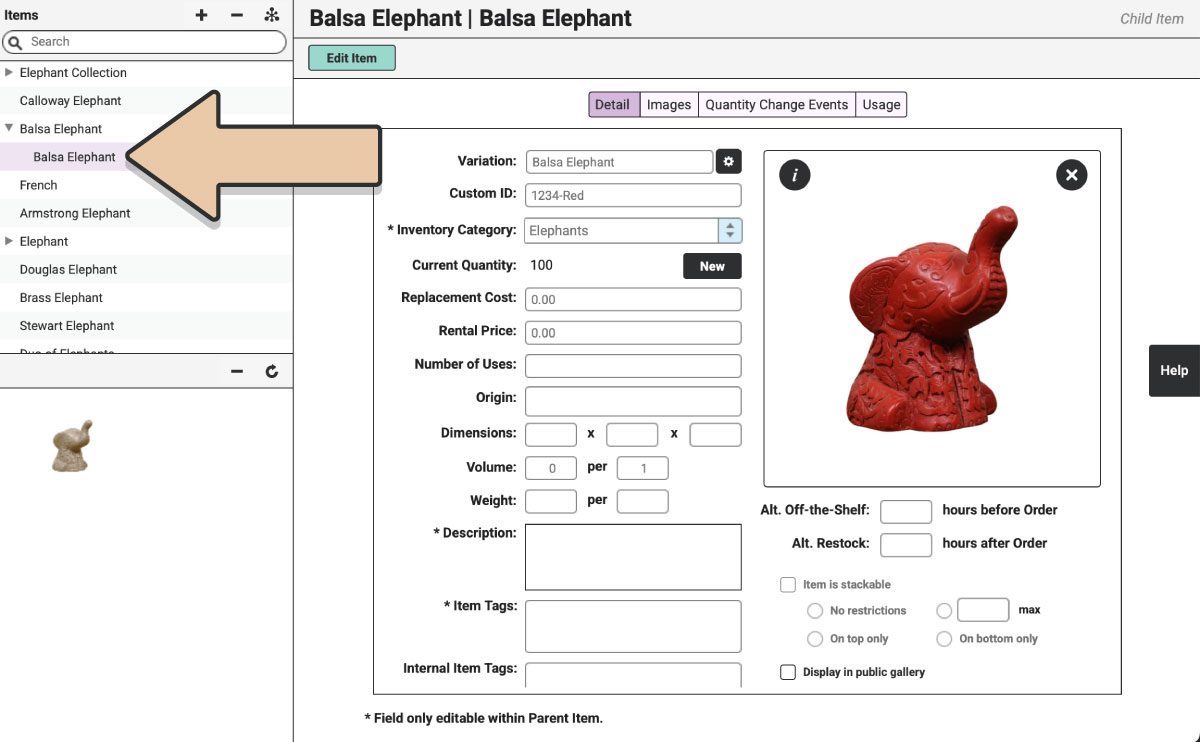
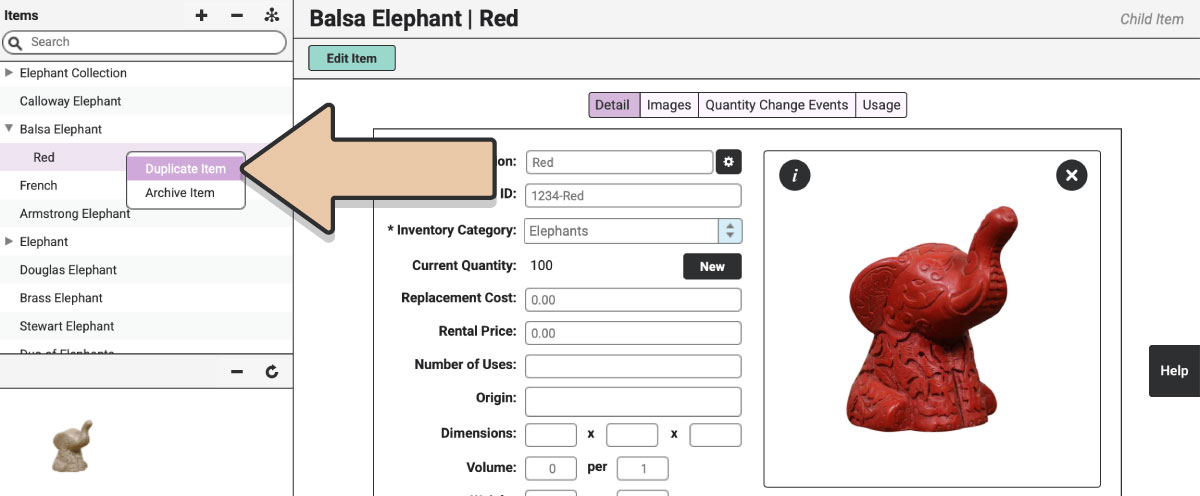
You’ll see in the upper right corner of the screen that you’re now editing a “Child Item.”
The Parent Item will inherit the name of the Child Item, so you’ll first want to make sure the Parent Item has the correct name. The Parent Item name should be the common denominator (i.e. the fabric, the collection type, the pillow shape, etc.). For example, Ivory Linen, Winston Collection, Scalloped Pillow, etc.
To view or collapse Child Items under a Parent Item, click the caret to the left of the Parent Item.
The Parent Item will determine the Category, Description, Item Tags, and Related Items for the entire group of variations. All Child Items will have these in common. You’ll also see the “Parent Item” label in the upper right corner to help you know you’re working with the Parent Item.
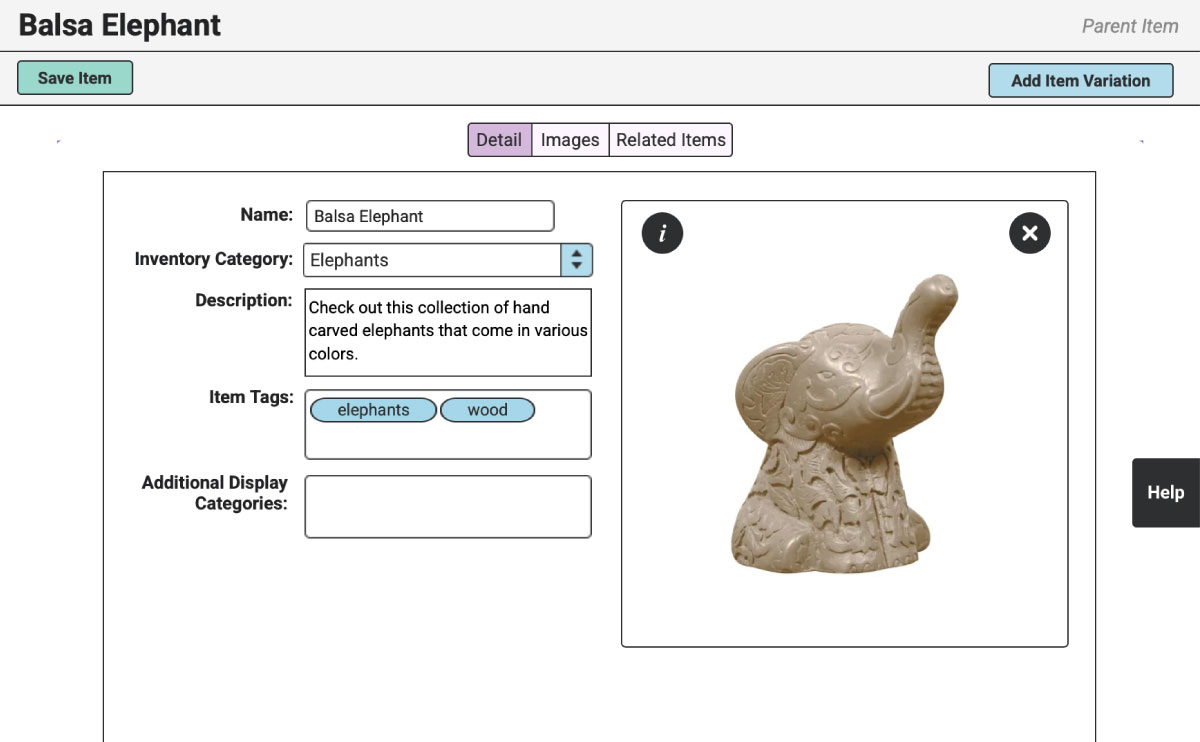
Now is a great time to upload an image for your Parent Item that demonstrates the grouping or common denominator.
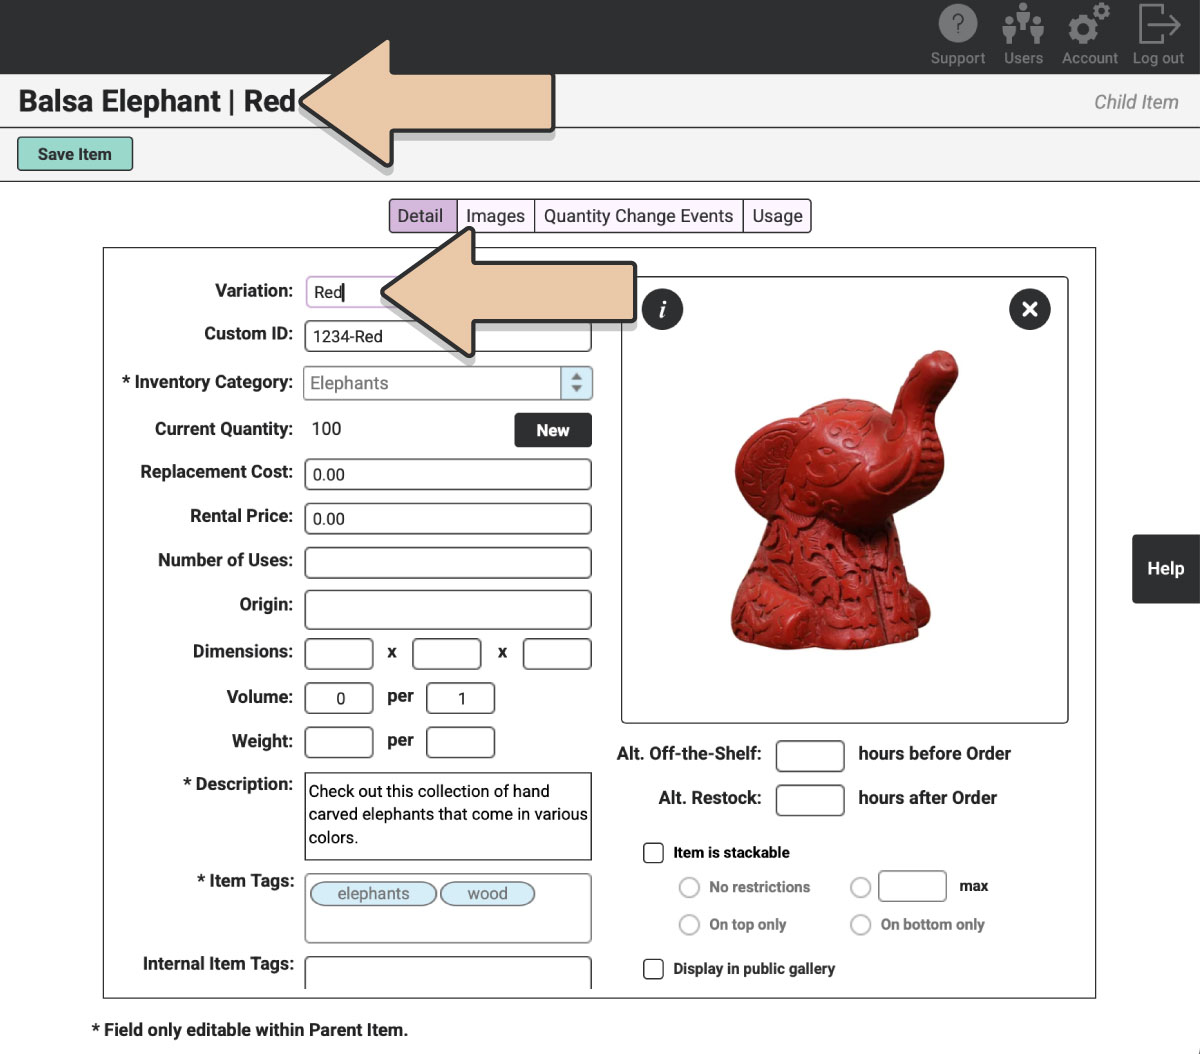
Next, you’ll name the Child Item by how it varies.
For example, if your Parent Item was “Ivory Linen,” maybe you’ll create variations by size. So the Child variations could be something like 90″ Round Tablecloth, 80″x120″ Rectangle Tablecloth, Napkin, Table Runner, etc.
The Child Item name will display as “Parent Item | Child Item.”
In our example here, we’ve named our Child Item “Red,” so the name displayed will be “Balsa Elephant | Red.”
With the “Ivory Linen” example, you’d have:
Ivory Linen | 90″ Round Tablecloth
Ivory Linen | 80″x120″ Rectangle Tablecloth
Ivory Linen | Napkin
Ivory Linen | Table Runner
You can create new variations in a few ways:
OPTION 1: From the Parent Item, select “Add New Variation” again
OPTION 2: Duplicate an existing Child Item Variation
OPTION 3: Drag and drop existing Rental Items into the grouping
Once you’ve created your Child Item Variations, be sure that “Display in public gallery” is ticked on each one so they display on your website.*
*A Parent Item will only appear on your website once one of the Child Item Variations is ticked to “Display in public gallery.”
Kits can be part of an Item Variation grouping just like individual Items. Simply follow the same steps above for Kit Variations.
Online Gallery Display
Head to your website and select the Parent Item from the given category.
This will take you to a page with the first Child Item selected and displayed.
To choose another variation, click on the drop-down menu.
Selecting a Variation will change the image, rental price, and dimensions.
From here, customers can add variations to their Wishlists.
Additional Display Categories
Herd Leader only feature.
Parent Items and Child Items can both be displayed in other categories through Additional Display Categories.
A Child Item on its own will display as “Parent Name | Child Name”.
From your website, selecting a Child Item in an Additional Display Category will take the customer to the original Parent page to be able to view and select other variations.
RW Elephant iOS App
Variations can be viewed in the RW Elephant iOS App as individual Child Items (i.e., Parent Name | Child Name).
If you are adding Item Variations through the iOS App, you’ll create all of the Child Items just like normal Items. Then you’ll need to use a desktop computer to group them under a Parent Item.