The available Magical Specialized Items are:
- TEXT: Free form text that displays where Line Items Notes usually appear. Also used to create line breaks.
- HEADING: Free-form text that displays where Items usually appear
- BOLD HEADING: like a Heading but Bold
- PERCENTAGE BREAK: Use this to indicate which Items your percentage fees and discounts apply to
- DELIVERY TICKET PAGE BREAK: Create page breaks to bring clarity to your Delivery Tickets
When Text Items, Headings, or Bold Headings are added to an Order they will be displayed on the PDF but the Dimensions, Quantity, Price, Multiplier & Total columns will be left blank. This allows the included text to become a focal point which helps bring distinction and separation to your Orders.
PERCENTAGE BREAK & DELIVERY TICKET PAGE BREAK Items will not display on the Invoice PDF.
Creating Magical Specialized Items
By default, RW will automatically add the TEXT, HEADING, & BOLD HEADING items to your Account. If you’re not seeing them in your Account, you’ll need to create them.
If you’d like to start using PERCENTAGE BREAK or DELIVERY TICKET PAGE BREAK Items, you’ll need to create a new Item.
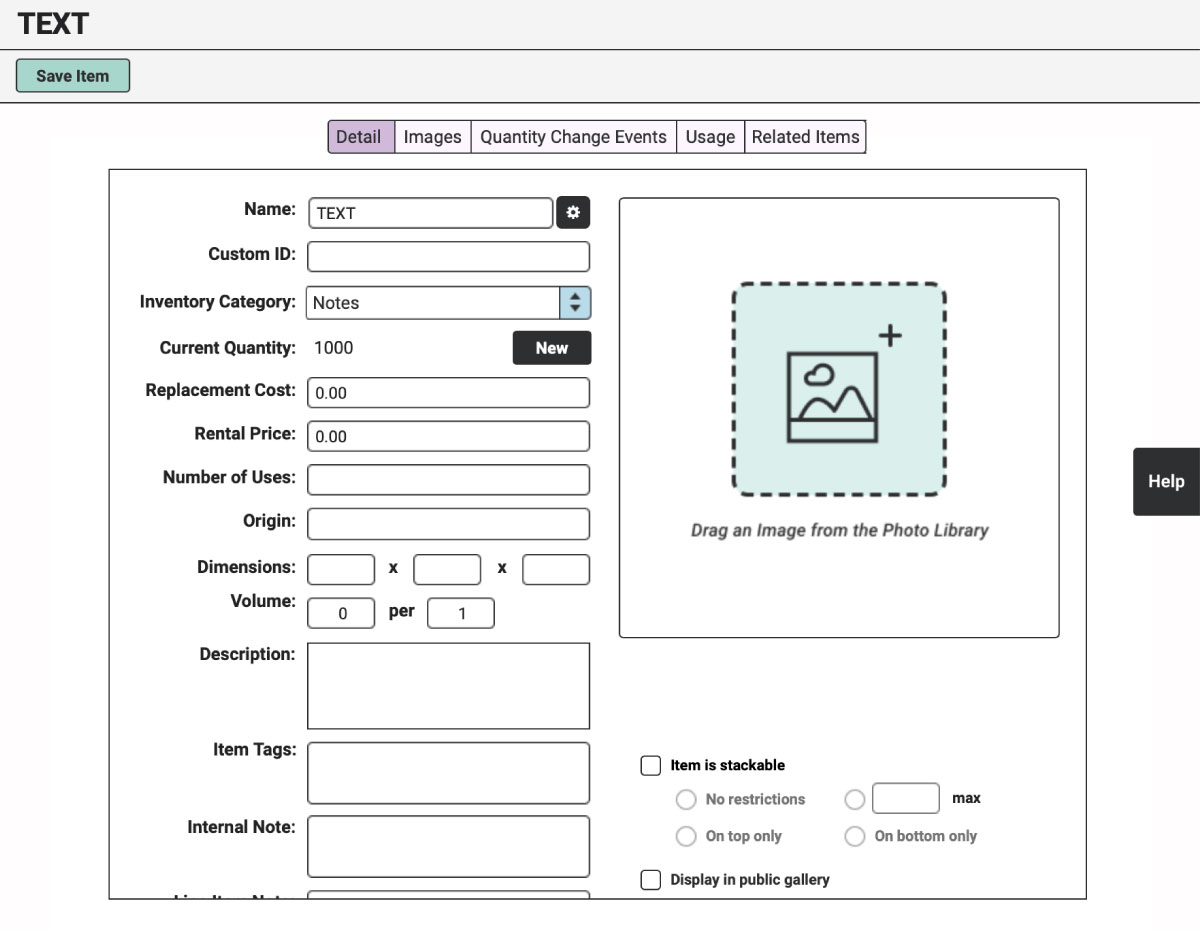
To create a Magical Specialized Item, navigate to the Items icon in the top left corner of your browser window.
In the far-left column, select the Category you want the Item to live in (i.e. Fees, Notes, Extras).
At the top of the second column, click the “+” button to add a New Item.
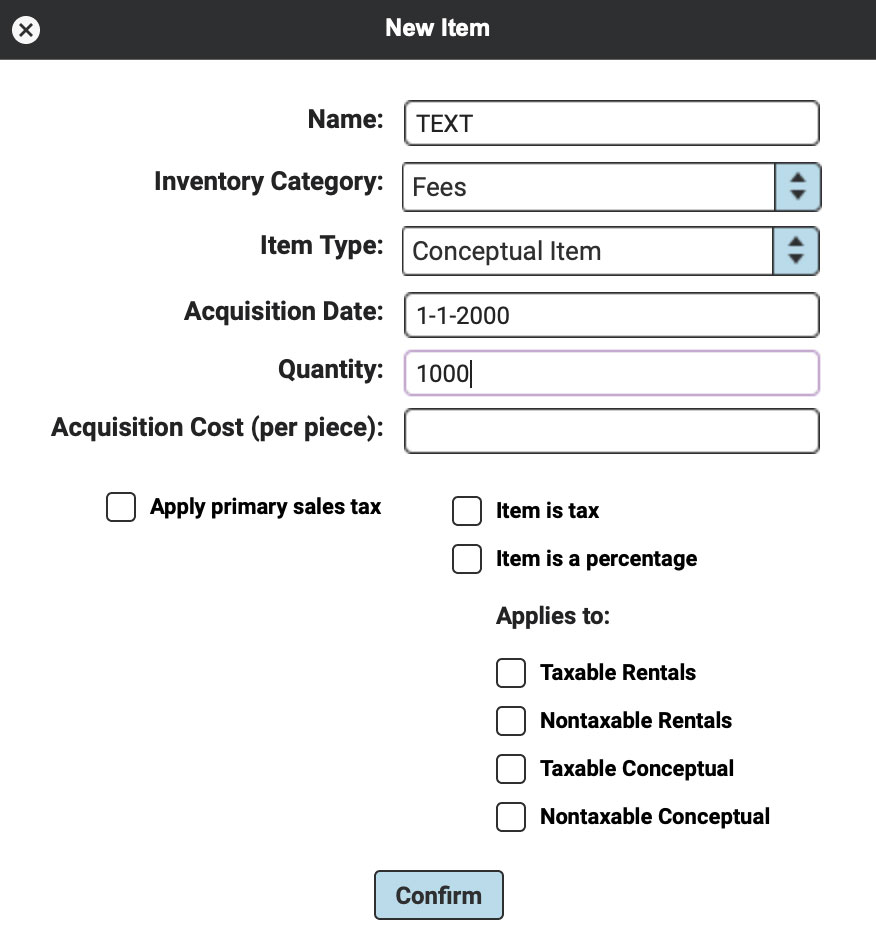
In the New Item Pop-Up, type in the Item name in all capital letters. The approved options are:
- TEXT
- HEADING
- BOLD HEADING
- PERCENTAGE BREAK
- DELIVERY TICKET PAGE BREAK
Please note: The exact spelling, capitalization, and spacing are important for RW to recognize these Items.
In the Item Type drop-down, select “Conceptual Item.”
Enter an Acquisition Date in the distant past (i.e. 1/1/2000).
For all Conceptual Items, we recommend adding a large quantity, such as 1000.
Leave the Cost field blank. Click the blue “Confirm” button.
**Repeat these steps for any of the other Magical Specialized Items you’d like to create.
How to use the TEXT Item on an Order
Use the TEXT Item to add extra Notes or to create spaces between Line Items on your Proposals, Confirmed Orders & Wishlist PDFs.
From the Orders icon in the top left, select the pertinent Order you would like to annotate.
Click the green “Edit Order” button and navigate to the Line Items tab of the Order.
Drag and drop the “TEXT” Item onto the Line Items section of the Order.
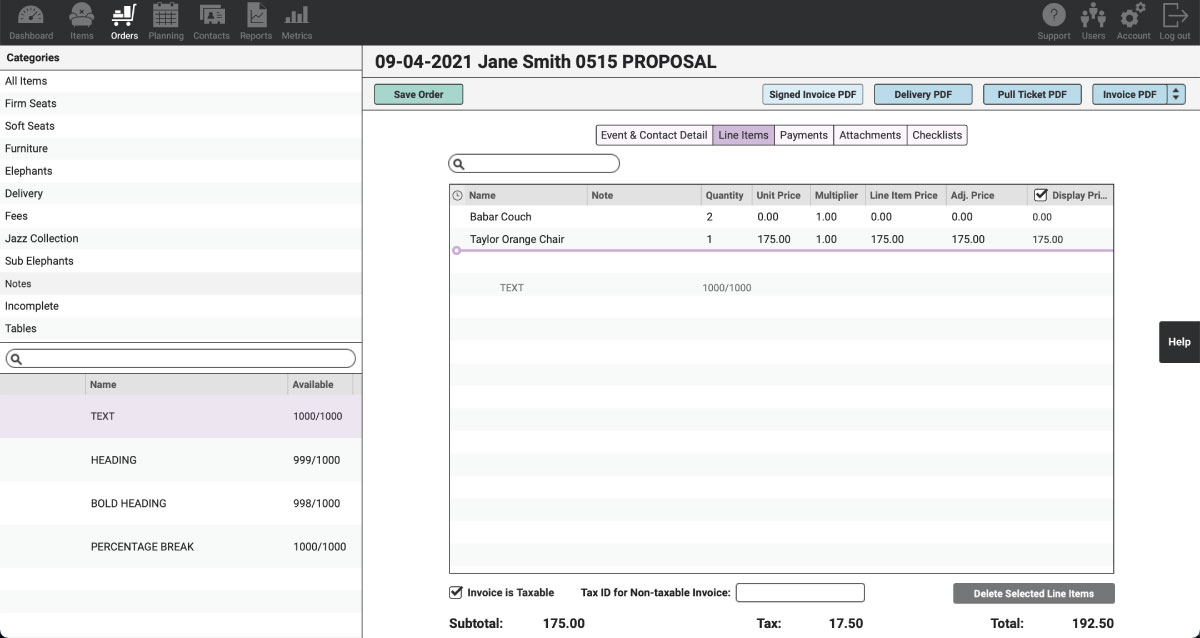
To use the TEXT Item, double-click in the Item’s Note field. Type whatever copy you’d like. This field can even handle lengthy notes.
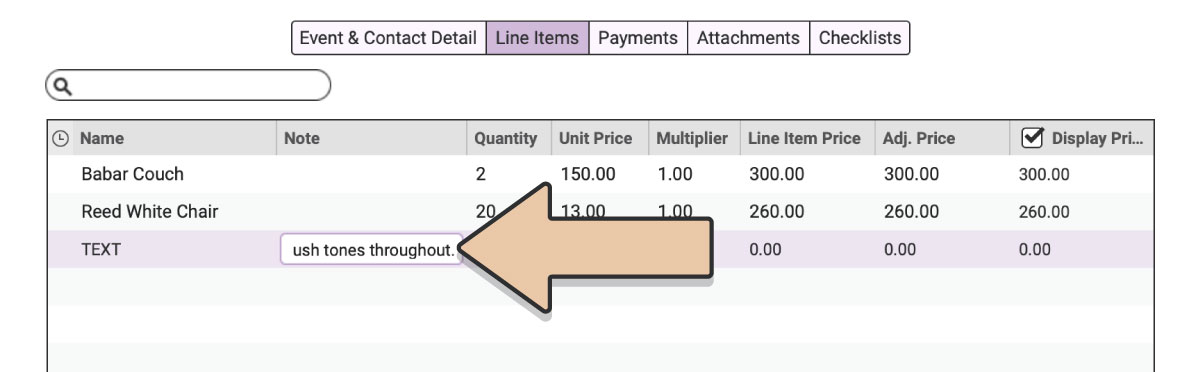
This Magical Specialized TEXT Item will now display on your Invoice PDFs in the same style as other Line Item Notes but on its own line..
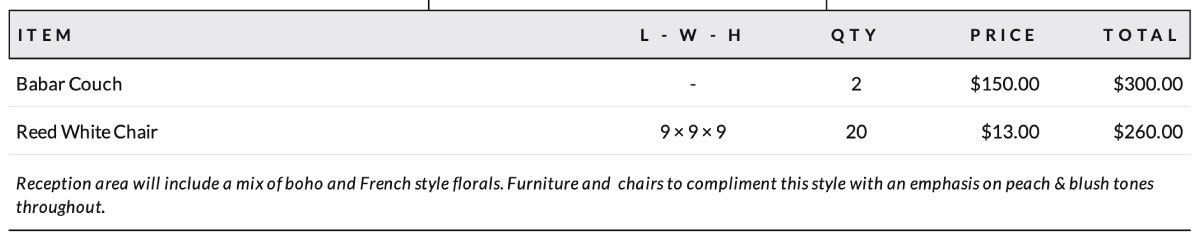
If you would like to use the TEXT Item to create a Blank Line Item to separate sections on your Order, leave the “Note” field blank.
Add as many TEXT Items to the Order as you desire to create separate sections.
Provide additional notes or add context. But remember, these Magical Specialized TEXT Items only show up on Proposals, Confirmed, and Wishlist PDFs as well as Delivery Tickets but not on Pull Tickets.
When you are finished, don’t forget to click the green “Save Order” button before you generate any PDFs.
Click the Invoice PDF button to generate the PDF and see your beautiful creation!
Voila!
How to use the HEADING & BOLD HEADING Items on an Order
As you may have guessed, these Items allow you to create Headings for sections within your Orders.
Select the pertinent Order you’d like to annotate.
Click the green “Edit Order” button and navigate to the Line Items tab of the Order.
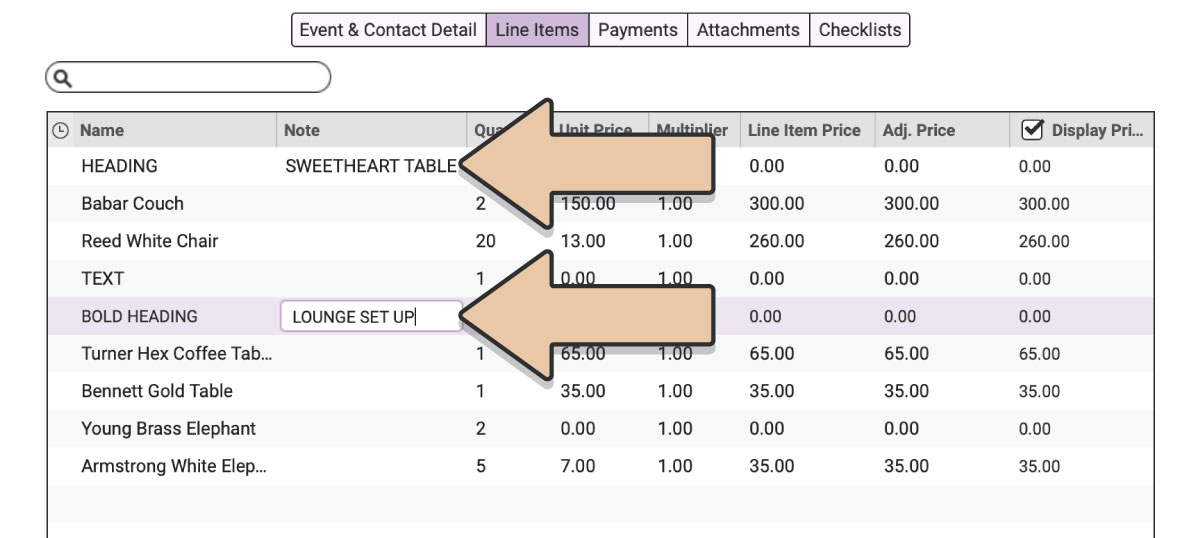
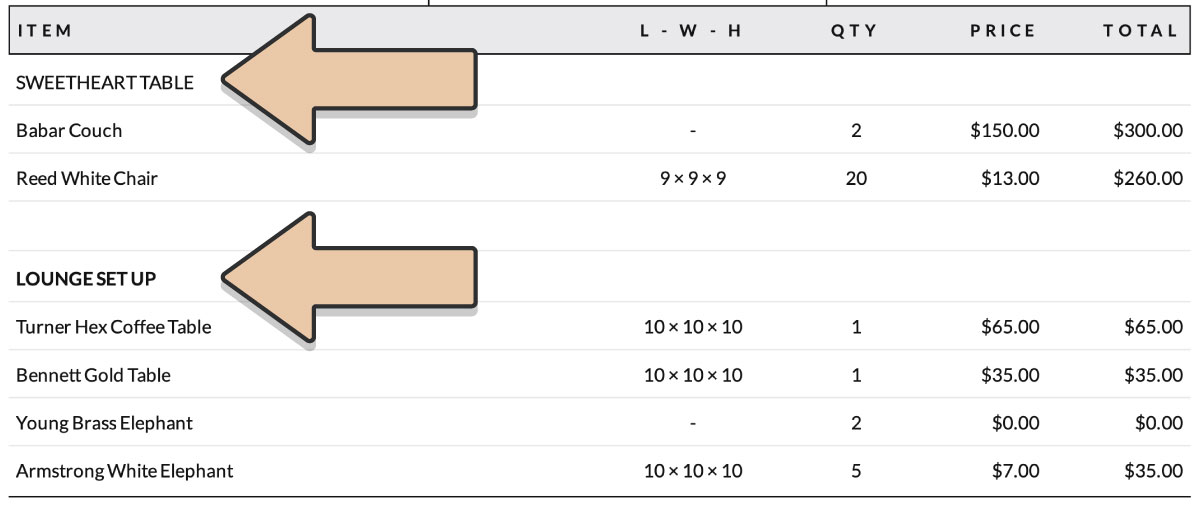
Drag and drop the HEADING Item onto the Line Items section of the Order.
In the “Note” field, type the Heading you would like to categorize the section by. (i.e. Sweetheart Table, Lounge Set-Up, etc.).
Bold Heading Magical Specialized Items act just like Heading Items but they’ll be in bold text on your Order PDFs.
How to use the PERCENTAGE BREAK Items on an Order
Within RW, Percentage Fees & Discounts are dependent on the order in which they’re arranged within the Line Items section of an Order.
Only Items ABOVE a Percentage Item will be affected by the percentage change.
Use the PERCENTAGE BREAK Item to more specifically define which Line Items a Percentage Fee or Discount applies to.
Here are some examples of when the PERCENTAGE BREAK Item comes in handy:
Example A: Create a break so a Percentage Item doesn’t apply to all the Items above it
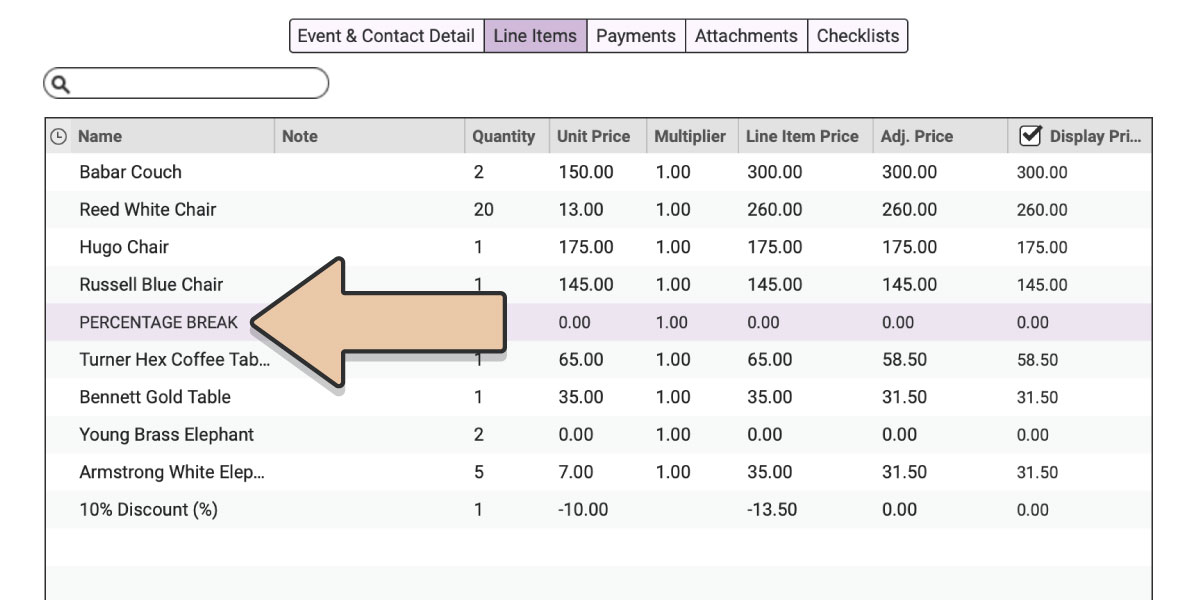
Without the PERCENTAGE BREAK a Percentage Item applies to all the Items above it:
With the PERCENTAGE BREAK the Percentage item only applies to the Items between the PERCENTAGE BREAK and the Percentage Item:
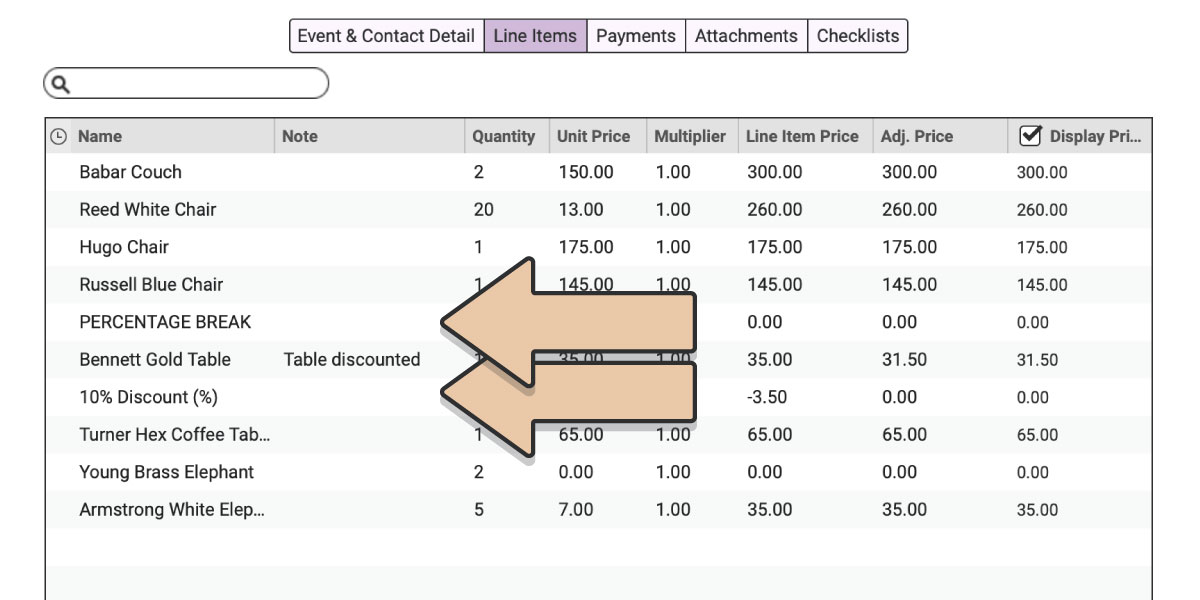
Example B: Apply a single discount to one or multiple Items in the middle of the Line Items section
Placing the PERCENTAGE BREAK item ABOVE an Item and the Percentage Discount or Fee directly BELOW the Item will apply the percentage just to that Item.
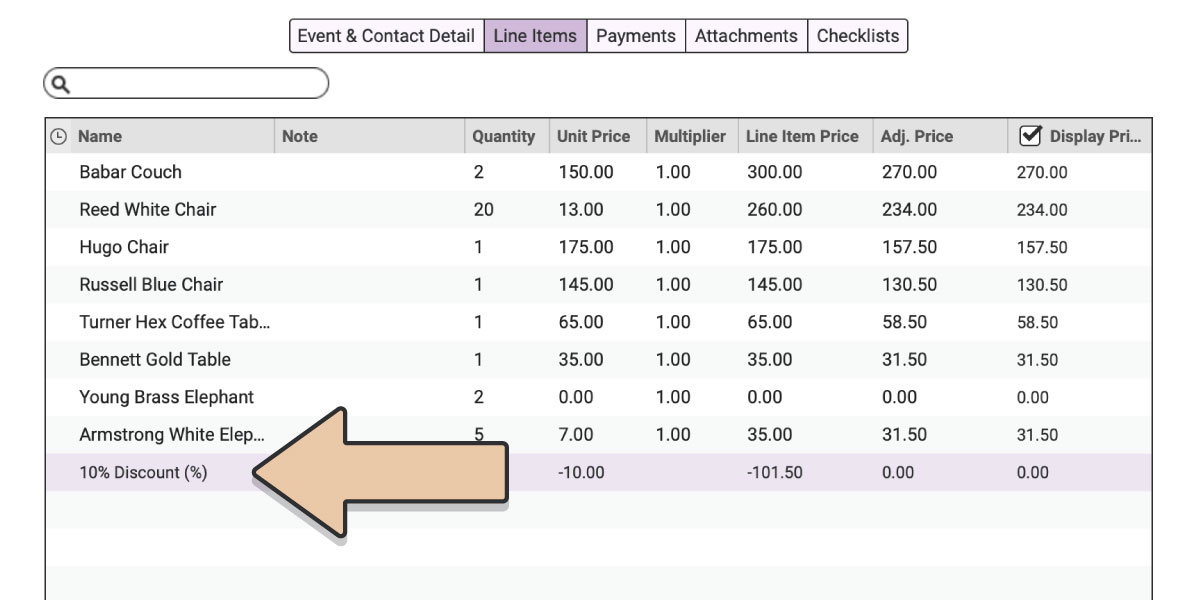
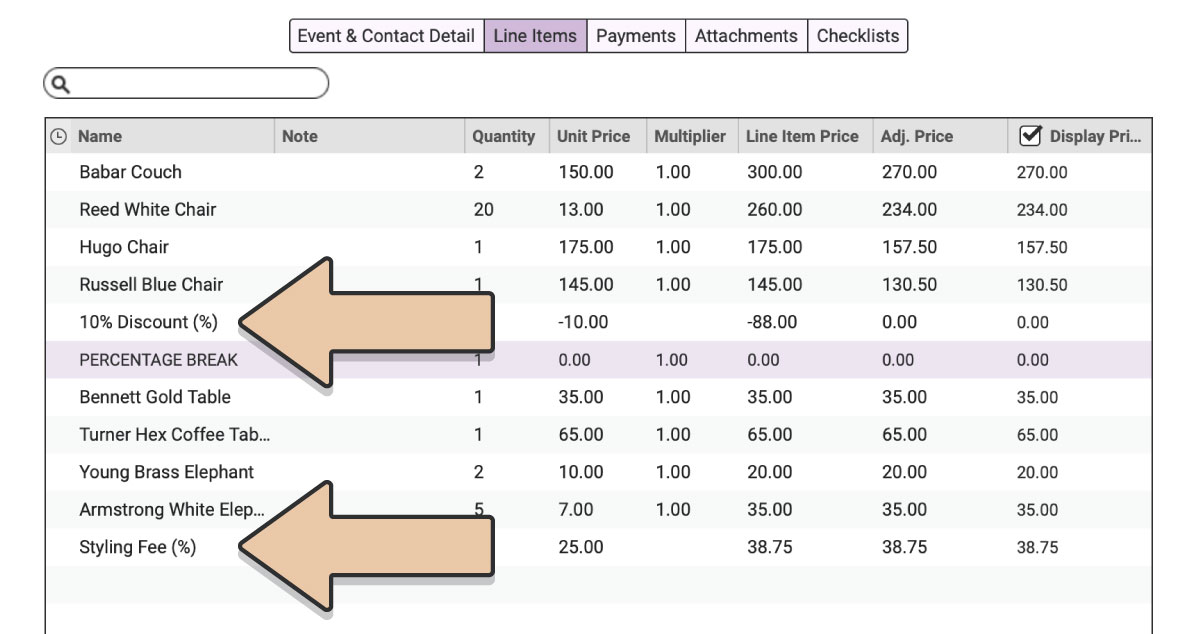
Example C: Use multiple Percentage Items on an Order and define which Items each applies to by placing a PERCENTAGE BREAK below the first Percentage Item.
In the example below, the 10% Discount will apply to all the Items above it and the Styling Fee will only apply to the Items below the PERCENTAGE BREAK.
These are just a few of the ways you can use the PERCENTAGE BREAK Item to define what Items percentages apply to.
How to use DELIVERY TICKET PAGE BREAK Item on an Order
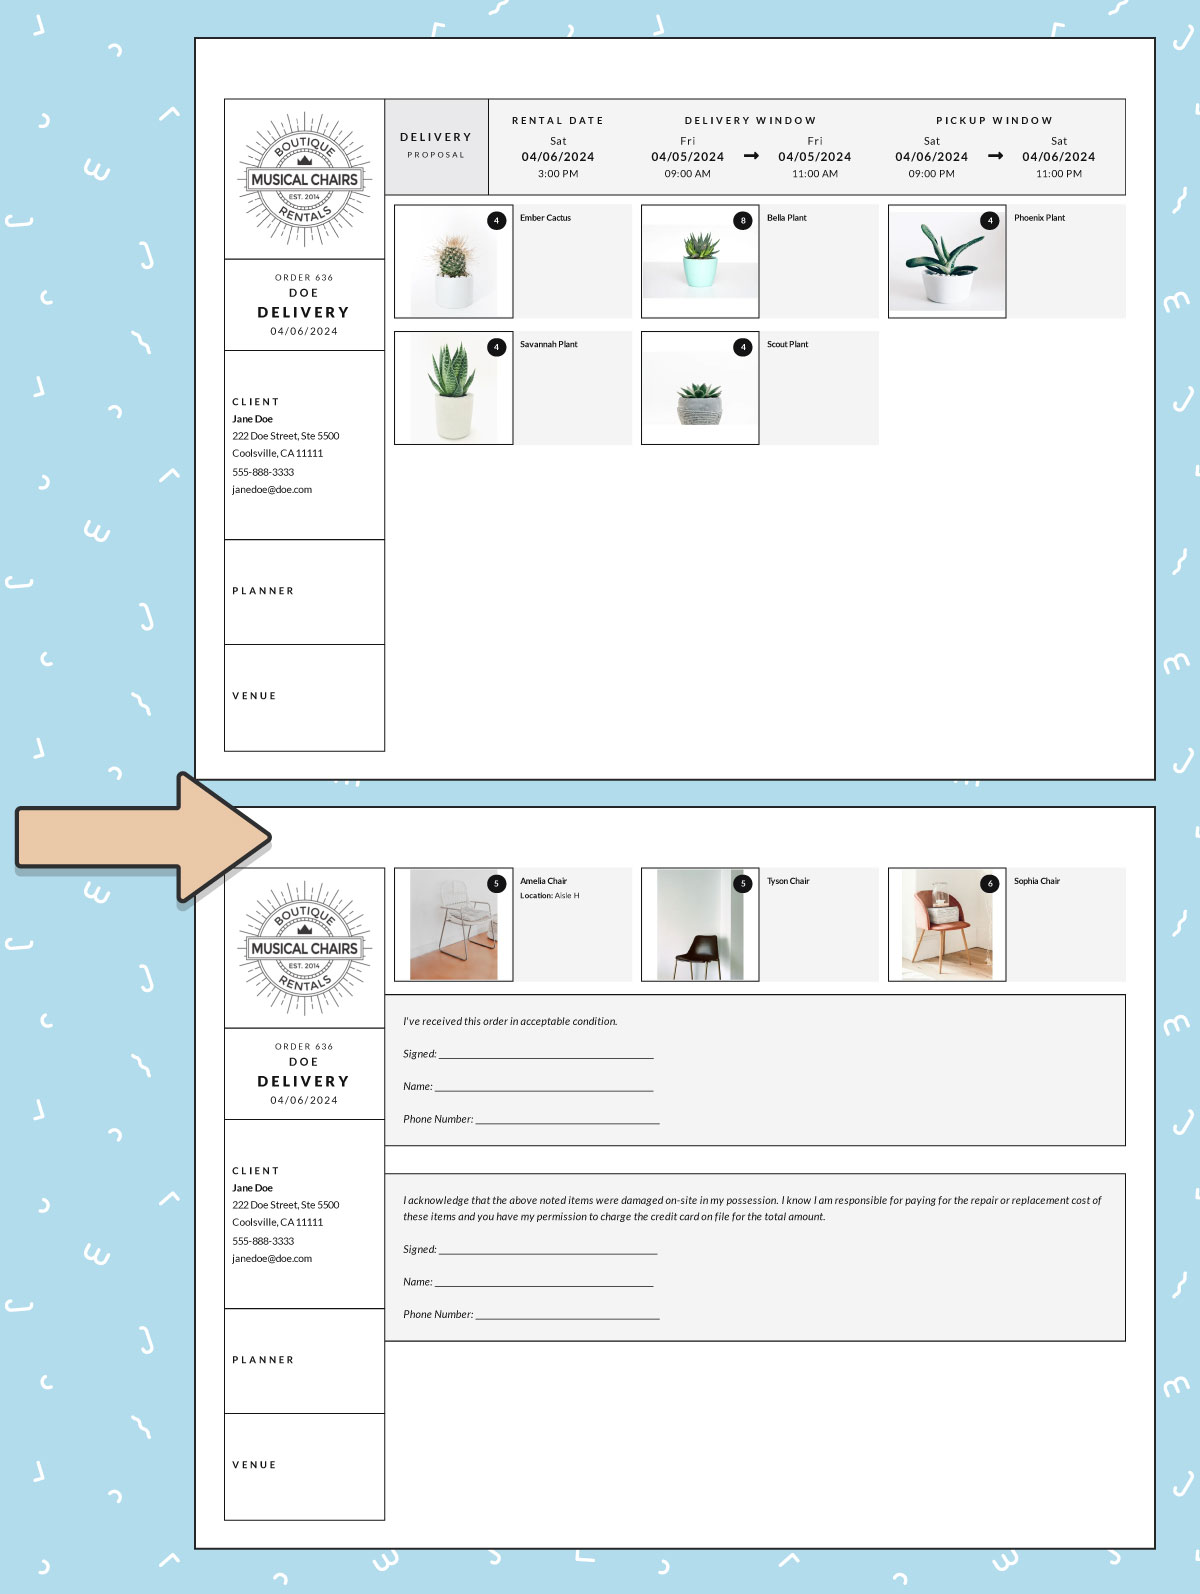
The DELIVERY TICKET PAGE BREAK Item allows you to create page breaks, or start a new page, on your Delivery Ticket PDFs. This can be helpful in instances that need more clarity on how Items are grouped together or if you have additional documents that you’d like to insert in a break once PDFs are printed.
Insert the DELIVERY TICKET PAGE BREAK Item on your Line Items list where you want the page break to appear. The DELIVERY TICKET PAGE BREAK will only affect Delivery Ticket PDFs, they will not affect your Invoice PDFs or Pull Ticket PDFs.
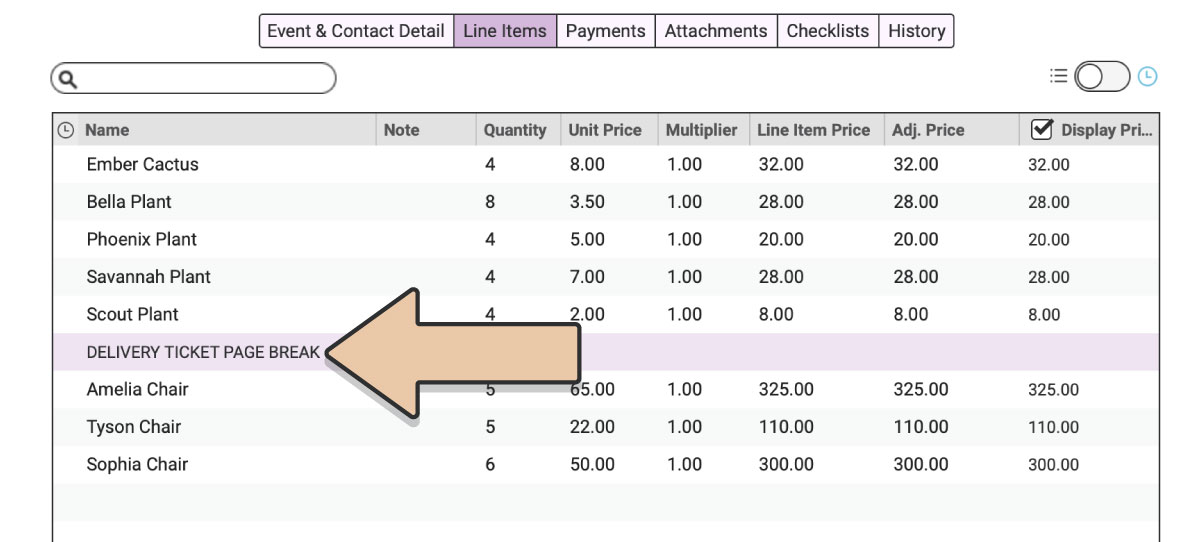
Generate a Delivery Ticket PDF and you’ll see a new page begins where you’ve placed your DELIVERY TICKET PAGE BREAK Item.
Order PDFs
Magical Specialized Items will reflect on Invoice & Wishlists PDFs within the Line Item section as well as the Image sections. You can turn off Magical Specialized Items from appearing on the Image Pages within Invoice Settings under the Template Regions tab.
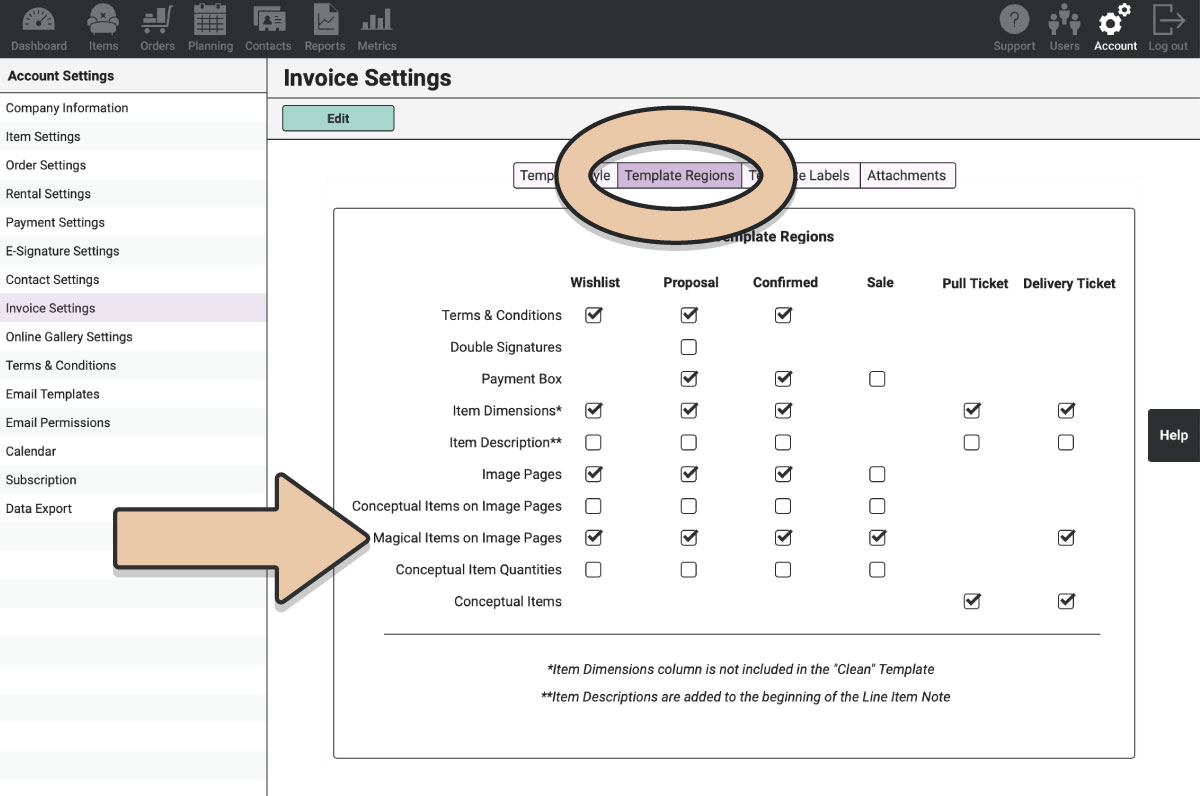
Additionally, Magical Specialized Items will also be displayed on Delivery Ticket PDFs as a way to keep things organized. Please note that DELIVERY TICKET PAGE BREAK Items will still function on Delivery Tickets even if the above tick box for Delivery Tickets is unticked.
Pull Tickets will not display any Magical Specialized Items.
Happy annotating! 🙂